Three Secrets to Stunning iPhone Photography
…Pssst! We have a photo industry secret to share: The very first step to great photography is simply pulling out your camera.
The second step is knowing how to use it.
We’re giving you the tools to take great photos using the best camera you already have: your iPhone. In this post, you’ll learn how to channel casual iPhone snaps into works of art that will stand the test of time. Get started with these three essential tips that experienced photographers rely on every time they click the shutter. You’ll be capturing beautiful images with greater creative control… right from your iPhone.
Meet the co-authors:

Lauren Olinger
Lauren Olinger is the owner and lead photographer of Red Cardinal Studio, based in Winston-Salem, NC. Her background in photojournalism comes with experience in the White House Photo Office and BACKPACKER Magazine. Her work has been featured in the Washington Post, Axios, and in the wedding albums of hundreds of happy brides.

Lauren Gibson
Lauren Gibson is the owner and photographer behind Charlotte to Paris. Lauren is passionate about slow travel: appreciating the small, beautiful moments of exploring the world around you, wherever you are. Focusing on urban landscape and travel photography, she offers art prints for online purchase and at local boutiques and events in her home city of Charlotte, North Carolina.
3 Tips for Taking Better Travel Photos… with your iPhone!

Au Petit Fer à Cheval, Paris by Lauren Gibson.
As the saying goes, the best camera is the one you have with you. And lucky for us, we live in a time when our phones have incredible cameras, and they fit right in our pockets.
We love pulling out our iPhone cameras, especially when we want to capture something unexpected. Another bonus: a phone doesn't draw much attention as a larger camera, enabling us to discover great candid moments, especially as we travel.
iPhones often don’t draw a lot of attention - it’s easier to take a photo in a busy market or snap away into the evening when a larger camera would draw unwanted attention.
Plus, without lugging any extra gear, the iPhone grants access to tools like exposure compensation, HDR, and aperture control (thanks to the iPhone’s portrait mode) right in your pocket!
Like any good tool, the best results require a little technique. That’s where we come in. With our three simple tips, you can begin to create photos you are proud to share, wherever you might be in the world.
Travel Photography Tip No. 1 | Turn On Your Camera Grid

To turn on the Camera Grid, navigate to Settings > Camera on your iPhone. Under Composition, toggle Grid to the “ON” position (green).
Photo Composition & The Rule of Thirds
Once you turn on the grid, you can tap into something called the “Rule of Thirds.”

October Sky, Paris. I took this image with my Nikon DSLR, but look at the composition - the obvious subject, the Eiffel Tower, is situated two-thirds of the way to the right, drawing your eye first to the tower itself and then to the soft, beautiful sunset surrounding it. - Lauren Gibson
The Rule of Thirds suggests that if you place a 3x3 grid on top of a piece of art, our eyes find it most appealing or interesting when the main subject of your image is placed along one of the gridlines or at an intersecting point of two gridlines.
This often leaves the rest of the image a bit more “open” with free space, and our eyes are drawn more energetically toward the subject you are capturing in your photo.
With your Camera Grid turned on, you have one tool at your fingertips to help improve your photo’s composition.
Using the grid lines to arrange the visual elements in your photo along the grid lines can drastically improve your photos.
Take a look at the two sets of images below to see how you can use your camera grid to line up visual elements in your photos:
In the first set of images, you can see how lines in the images themselves align with the grid.
Practice using the grid: to start, line up your main subject with one of the intersecting lines in the grid.
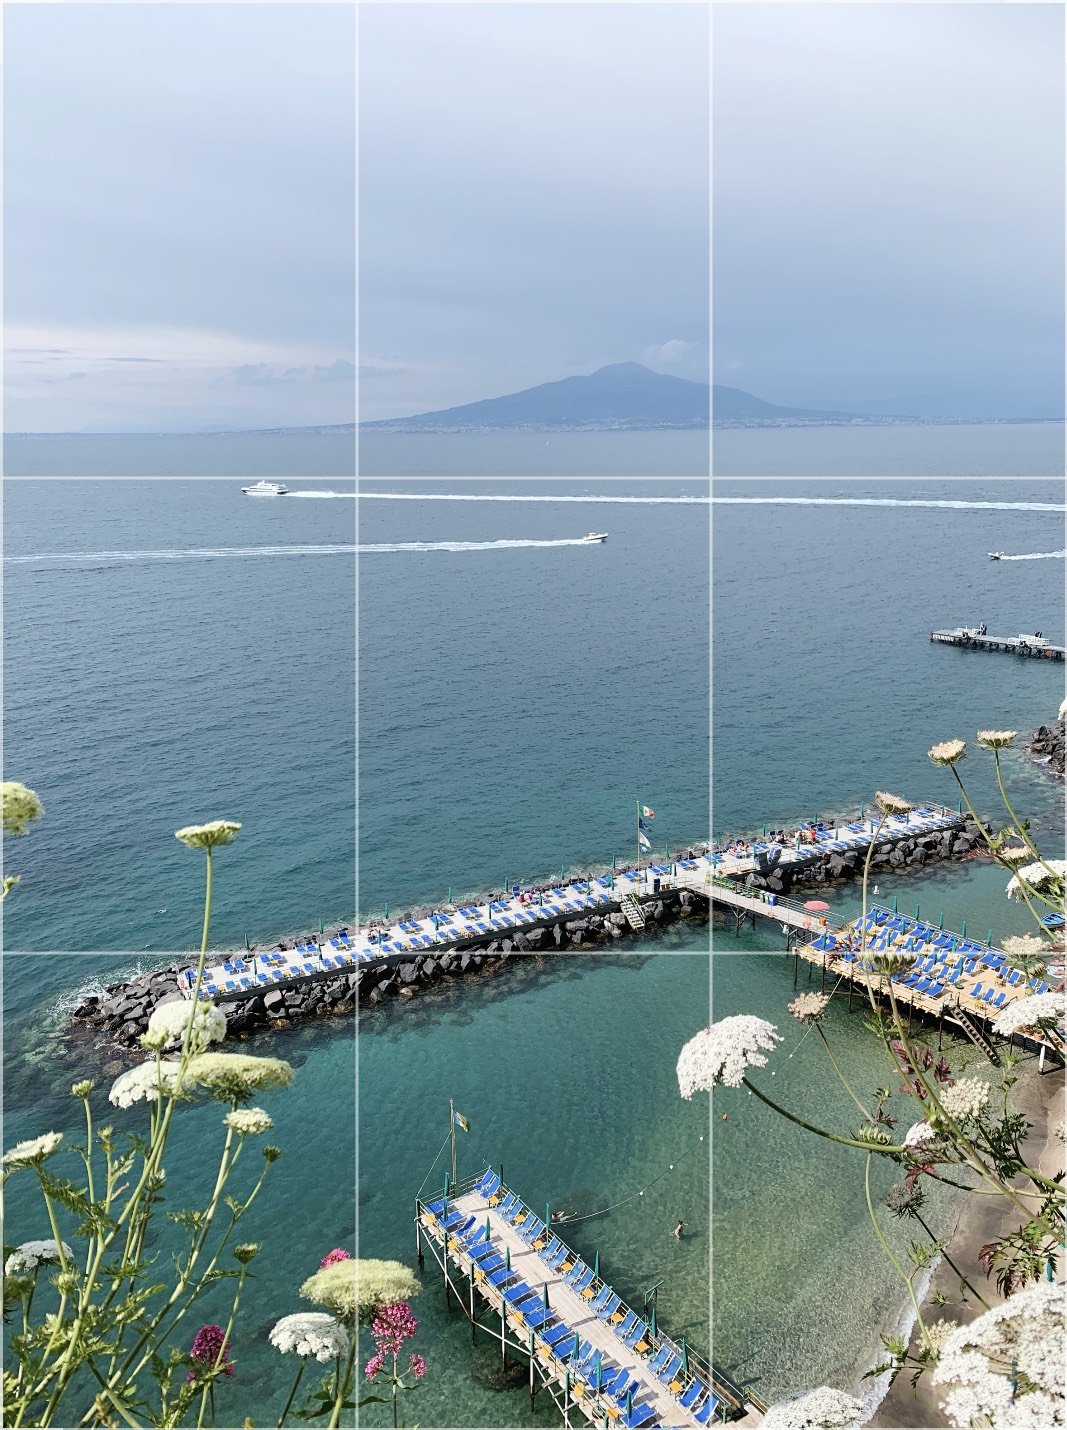
First Image: We notice the boat and its wake line at the top third, balanced by Mt. Vesuvius in the background. As your eye drops you’ll notice that the intersection of the piers hits the lower right third while the line of the dock spans the horizontal grid line. This all began by placing the horizon one third from the top of the frame and then looking for points of interest in the water. - Lauren Olinger. Image location: Sorrento, Italy.
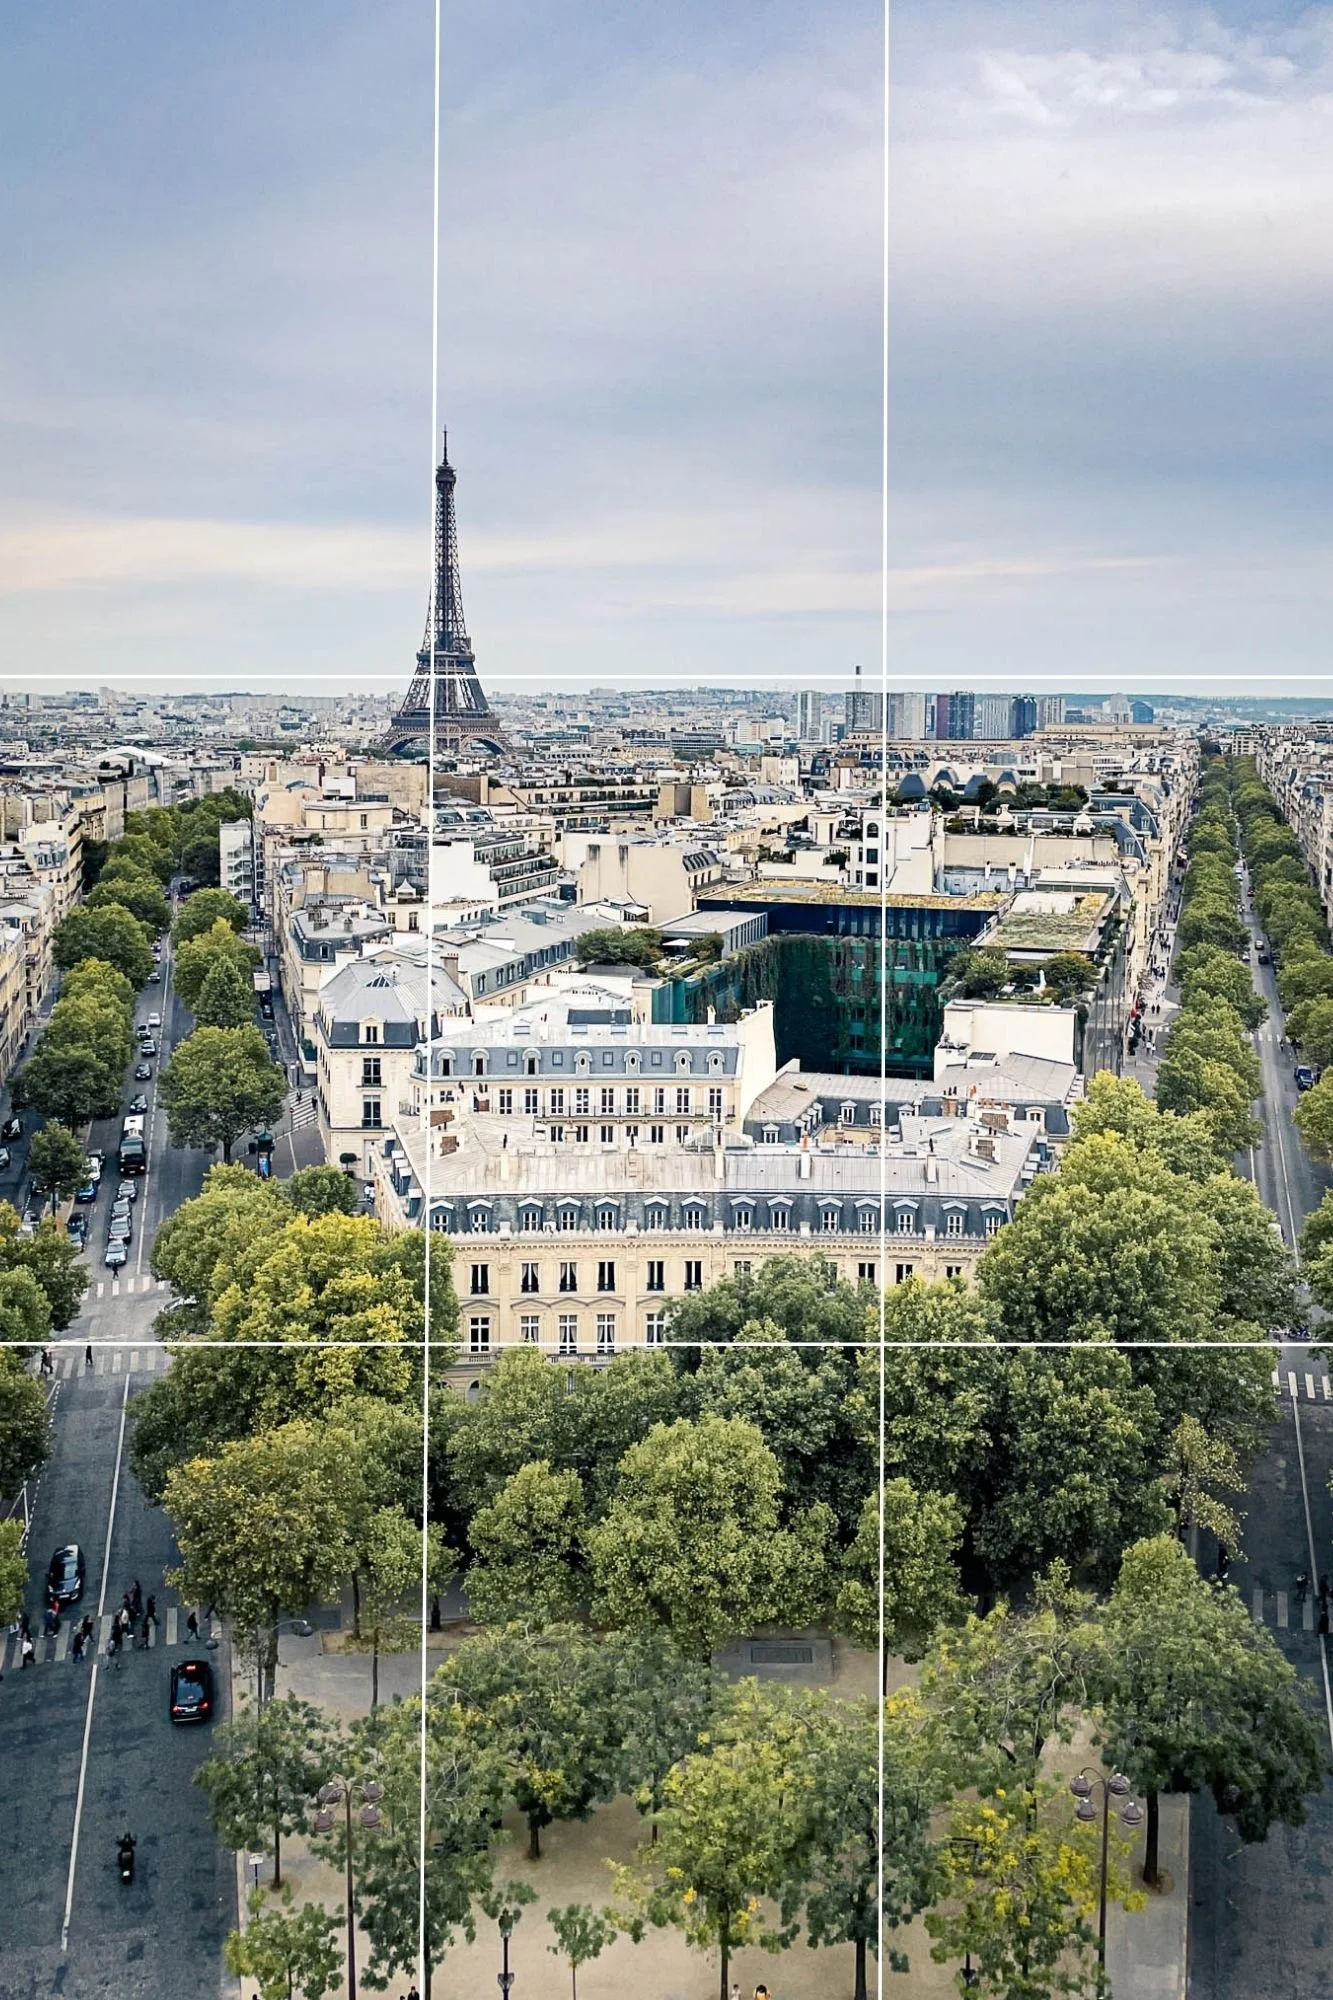
Second Image: We see the Eiffel Tower balanced at an intersecting grid point: where the top third meets the left third of the frame. The horizon is set along the top horizontal grid line. The open sky above is balanced by the heavier visuals in the bottom two thirds of the frame: the corners of the large limestone building align with the two vertical grid lines and lead your eye down to the bottom third of the frame. The two angled streets draw toward the bottom left and right thirds of the frame. Even though the initial focus is on the Eiffel Tower, your eye is drawn toward the details of the city below. - Lauren Gibson. Image location: the Arc de Triomphe, Paris, France.
In these next two images, the lines appear more subtly. You won’t always have hard lines present when you want to capture an image.
Practice using the grid: start to identify more subtle visual lines or points, and align them with your camera grid to create a visually appealing image.
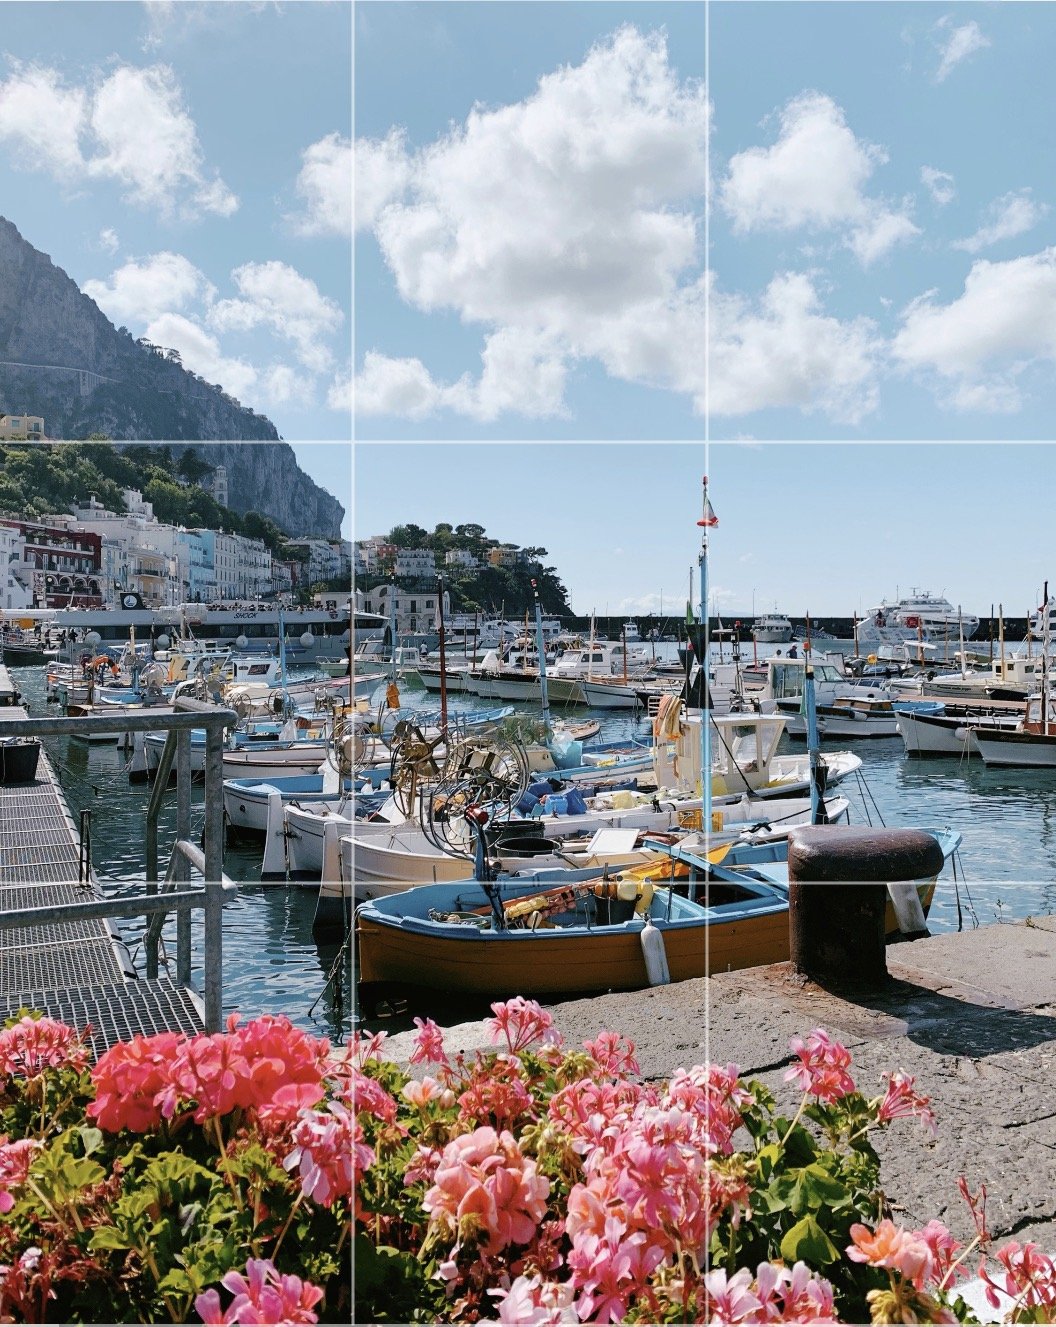
First Image: Here, our eye aligns the mast of the sailboat with the vertical right gridline and the boat itself with the intersection of the grid. As your eye wanders into the sky, you’ll notice that the bend of the cliff aligns with the top third and a delicate break in the clouds on the right aligns with the mast and its gridline. This frame began simply by wanting to remember a walk along the dock then taking a beat to find a way to bring it together in a memorable way. - Lauren Olinger. Image location: Capri, Italy.
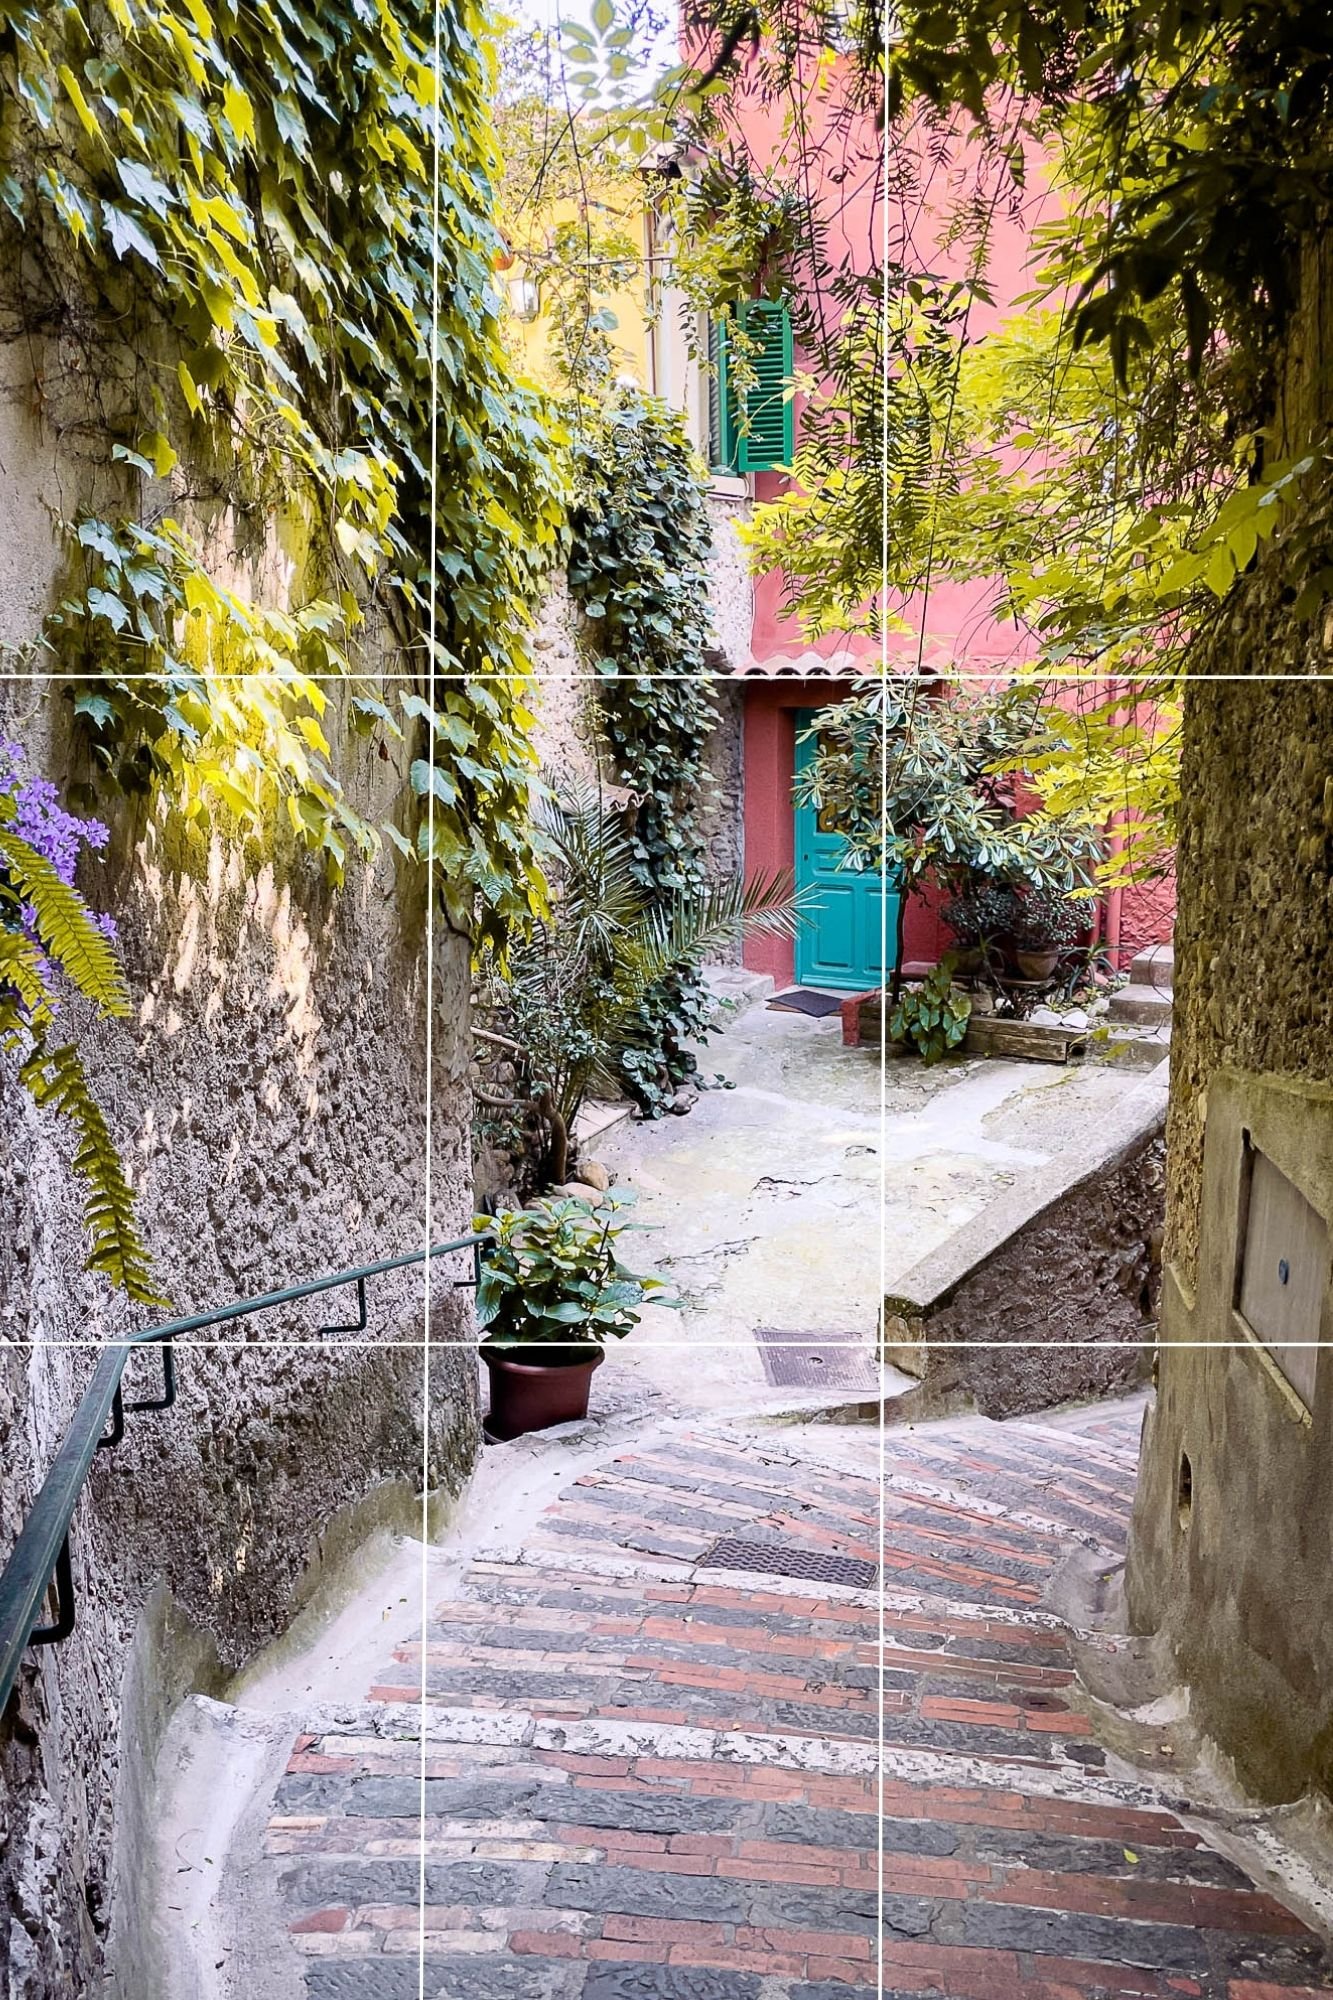
Second Image: In this image, your eye is drawn to the pink building that is situated in the top right third of the frame, overflowing into the quadrants to the left and below. The top of the terracotta porch overhand and the bright turquoise door meet just under the top right intersecting point of the grid. Your eye follows the light, drawn to the left third and center of the photo. The vines that hang from the building lead you down to the curving pathway, which appears and fills almost the entire bottom third of the image. The two bends in the railing are closely aligned with the bottom left horizontal line in the grid. This leaves the viewer with a feeling of wandering, which is exactly how this picture was taken: pausing to turn around and capture a serene, lush walk through a quiet town on the French Riviera. - Lauren Gibson. Image location: Roquebrune-Cap-Martin, France.
One more note on the Rule of Thirds: This basic principle applies to all styles of photography, not just landscape. If you are taking a portrait, try placing the eyes one third from the top of the frame. By taking the time to align your image within the grid you are able to elevate your photo from simple to striking. For even more on this topic check out this article from Digital Photography School.
Love these iPhone photo tips?

Then we’re pretty sure you’re going to LOVE our photo walking workshops! Join us in Paris for a slow travel adventure in the French capital: September 24-29 2023.
Together we’ll host photography workshops throughout the six-day tour. Our goal is to teach you to capture the charm of your travel experience using your iPhone or DSLR. Our workshops are geared towards beginners with the option of advanced sessions for those looking for a challenge.
There is no photography prerequisite but you may come home with a boost of confidence when it comes to turning simple memories into masterpieces.
Read all the details about the Paris Explorer Travel Experience, or send us a note and we’ll be in touch shortly! Merci!
Travel Photography Tip No. 2 | Use the iPhone Exposure Tool
Harnessing Light in your Photos
Just as the camera grid guides you to create a more interesting composition, learning to harness the light in a photograph will help you turn a meaningful moment into a lasting memory.
Harnessing light to create an image is truly the essence of photography. The exposure tool on your iPhone is one way that you can creatively control for the amount of light in your image (this is called exposure). You can use the iPhone’s exposure tool even if you have limited control over how bright or dark the scene is that you are shooting.
Photographs have balanced, or “correct” exposure when you can see the details in both the brightest and the darkest parts of a photo. There is some artistic decision-making at play, so try not to overthink it - your iPhone is super smart and will try to prevent you from snapping something that is way too overexposed (bright) or way too underexposed (dark).
But one way that you can control the amount of light in your image is by using the iPhone’s exposure tool. You can use it to either automatically balance the exposure in an image, or manually adjust the exposure with a single swipe to reflect your creativity and personal preference.
How to Use the Exposure Tool:
So how do you start playing with exposure on an iPhone?
First, open your Camera app. The iPhone camera’s viewfinder fills your phone screen and helps you choose exactly what to capture in your image.
Thanks to tip number 1, you’ll also see your grid layered over the viewfinder. Identify the subject of your photo - your dog, a tasty croissant - and line it up with the intersection of the gridlines (the Rule of Thirds at work!).
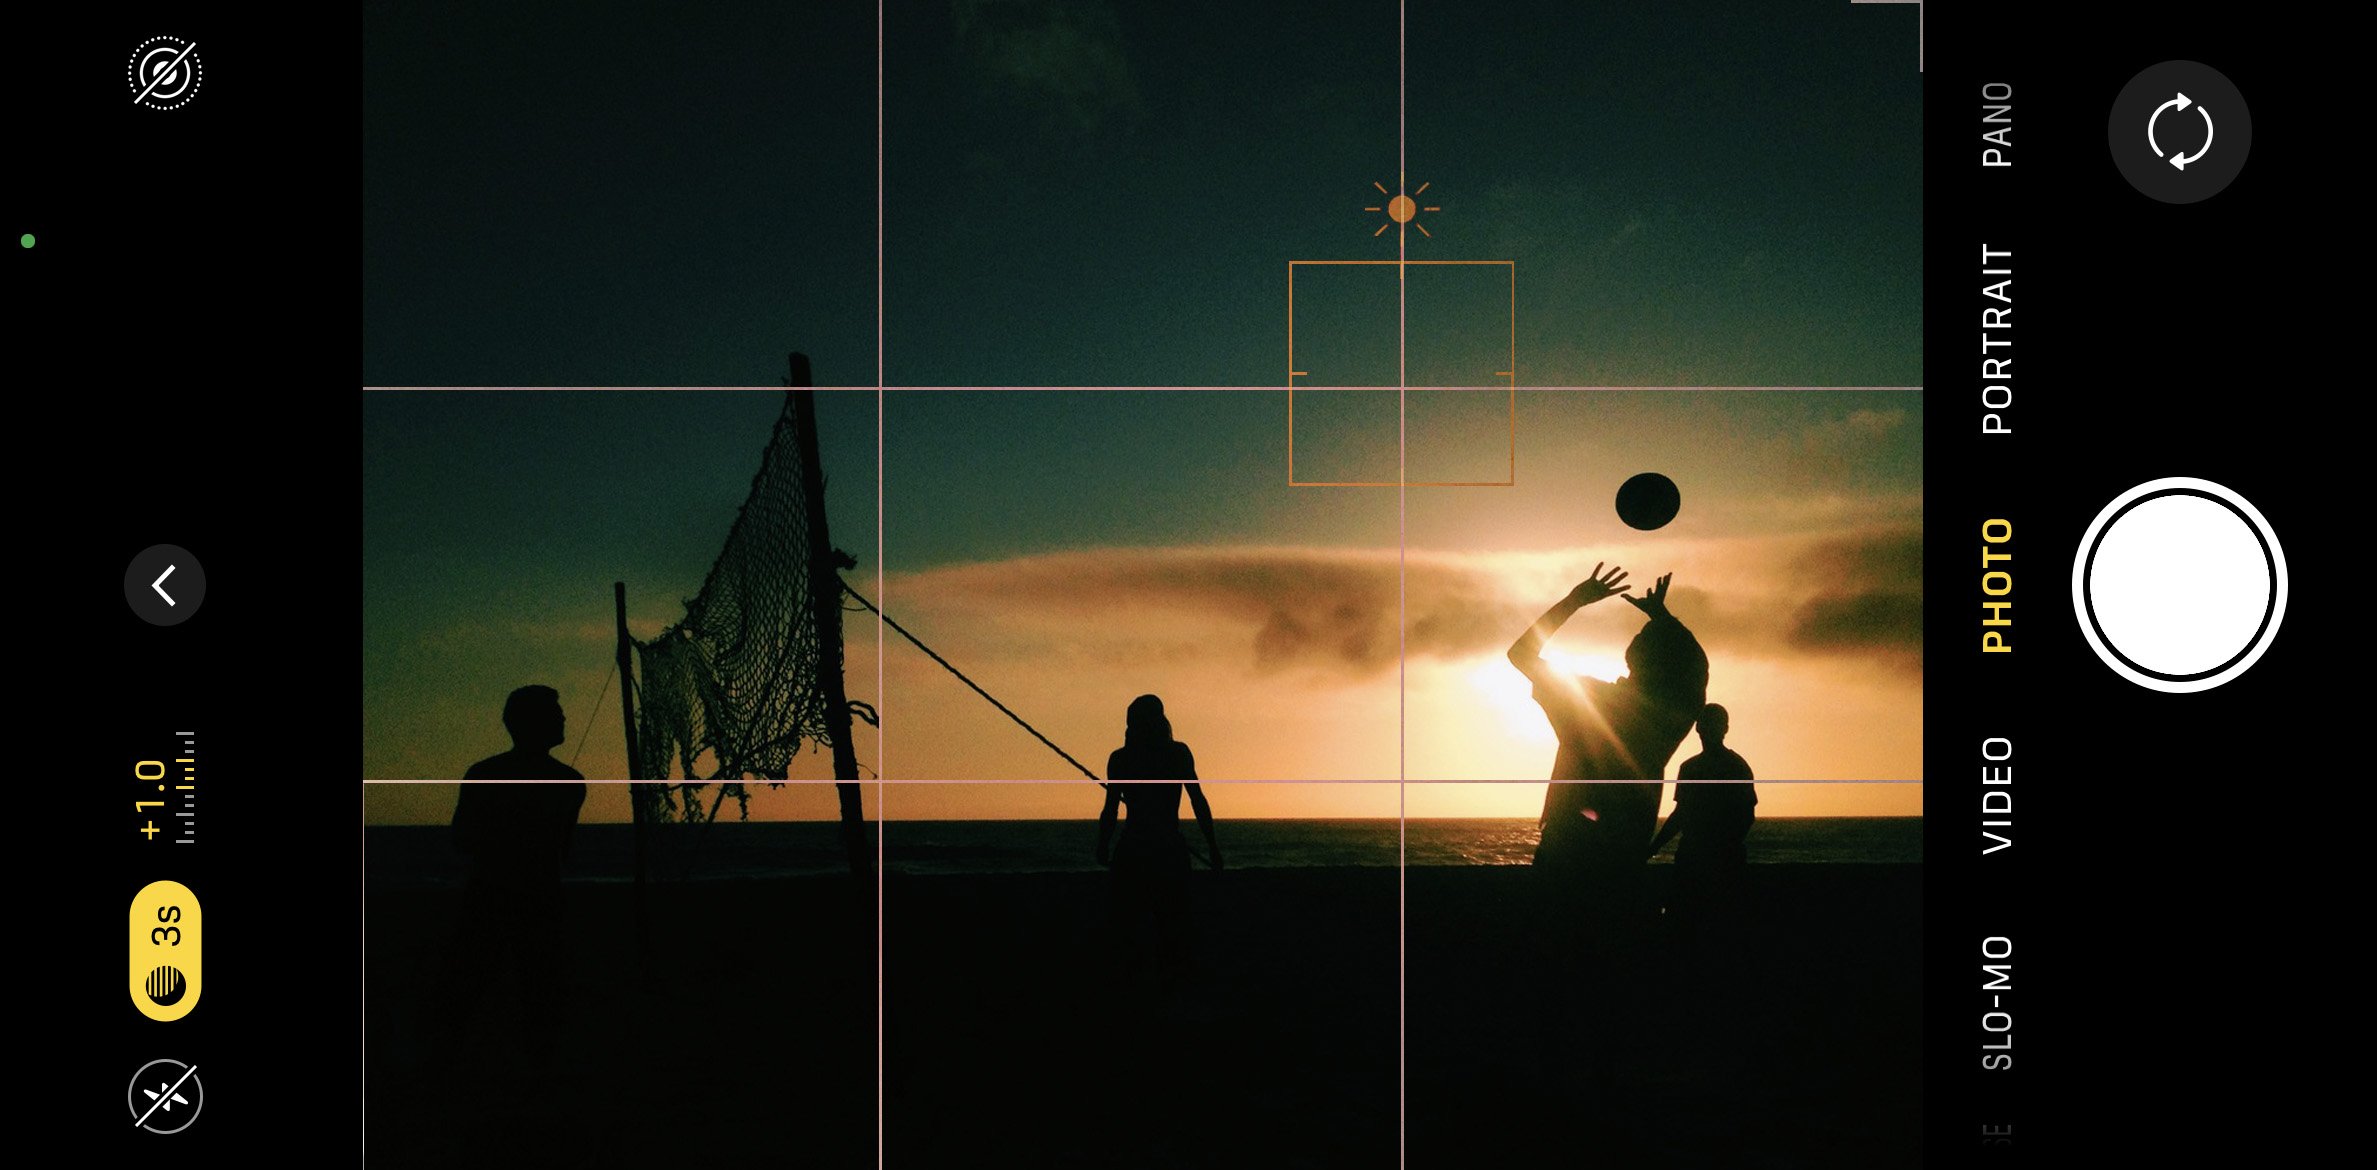
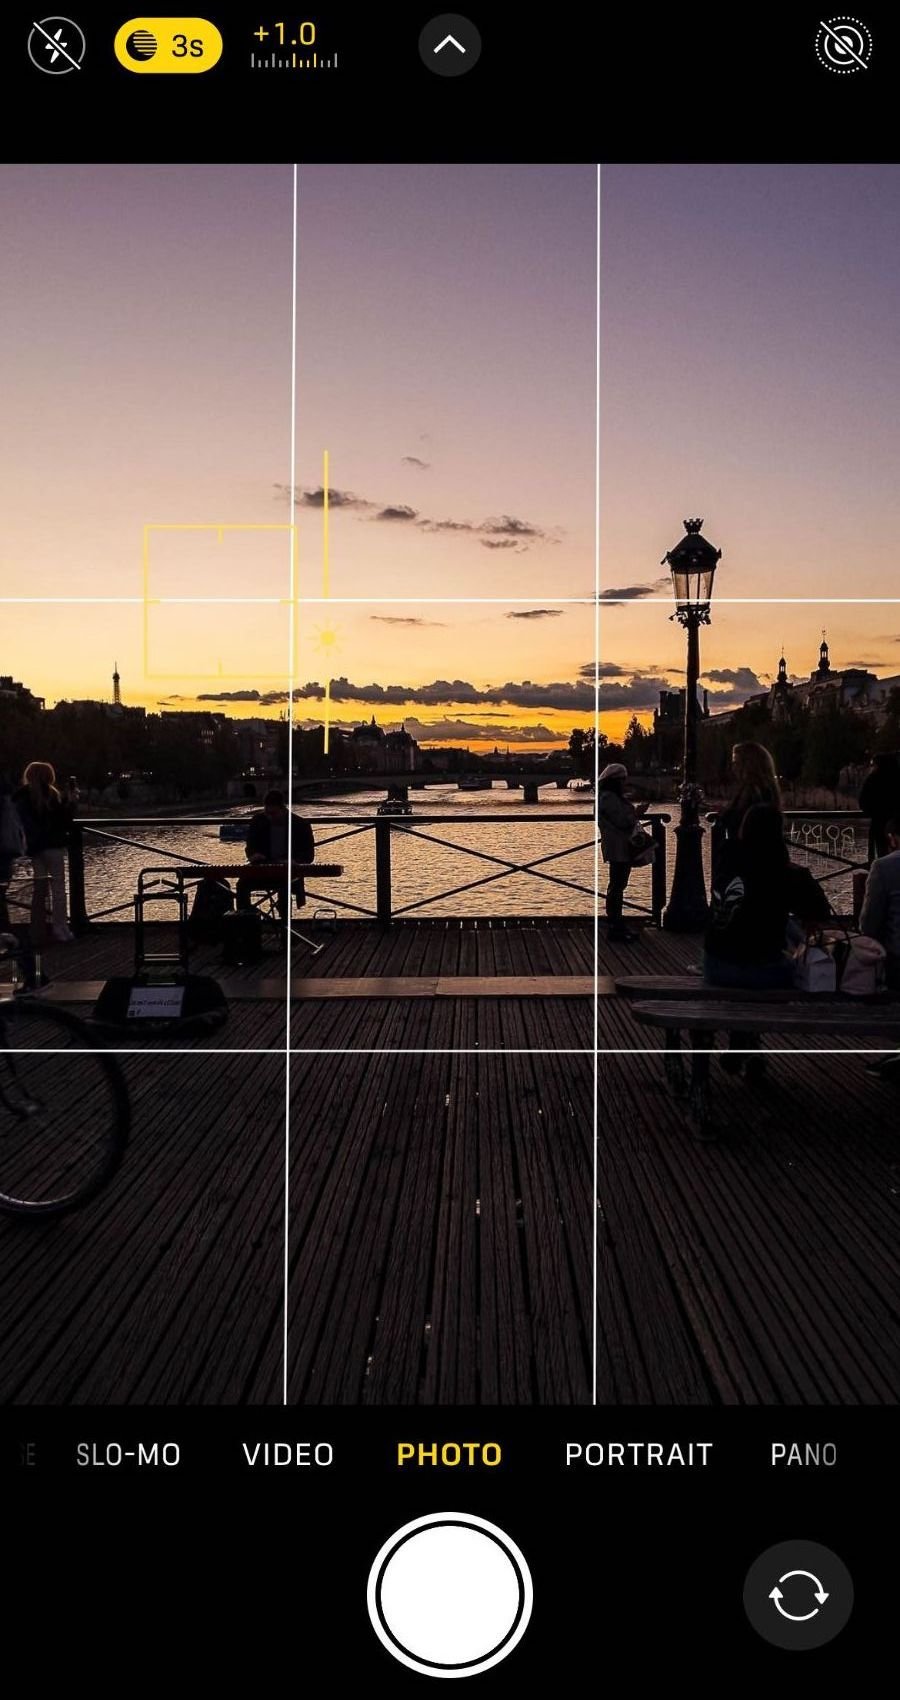
To work with the light in your image, tap once on the phone screen. A yellow square and sun icon will appear.
To engage the exposure tool on your screen, gently swipe up and down on the yellow sun icon.
Depending on your iPhone’s settings, you can also click the exposure icon at the top of your screen to display the exposure slider at the bottom, near the image capture button.
With either method, swipe to change the exposure.
See how your photo gets brighter and darker? This can help solve for those over or under exposed images, when part of the image is completely white or lost in shadow.
Looking for an even faster way to balance the exposure in your image? Click once on either a very bright or a very dark part of your image in the viewfinder. The iPhone camera’s automatic settings will take it from there and create a balanced image.
Left Image: I selected one of the brightest areas of the image by tapping on my phone screen.
Right Image: Then I adjusted the exposure. Since I gravitate toward vibrant images with deep blacks, I lowered the exposure to bring out the colors of the sky just after sunset. This creates a silhouette effect with the subjects in the foreground.
~ Lauren Gibson
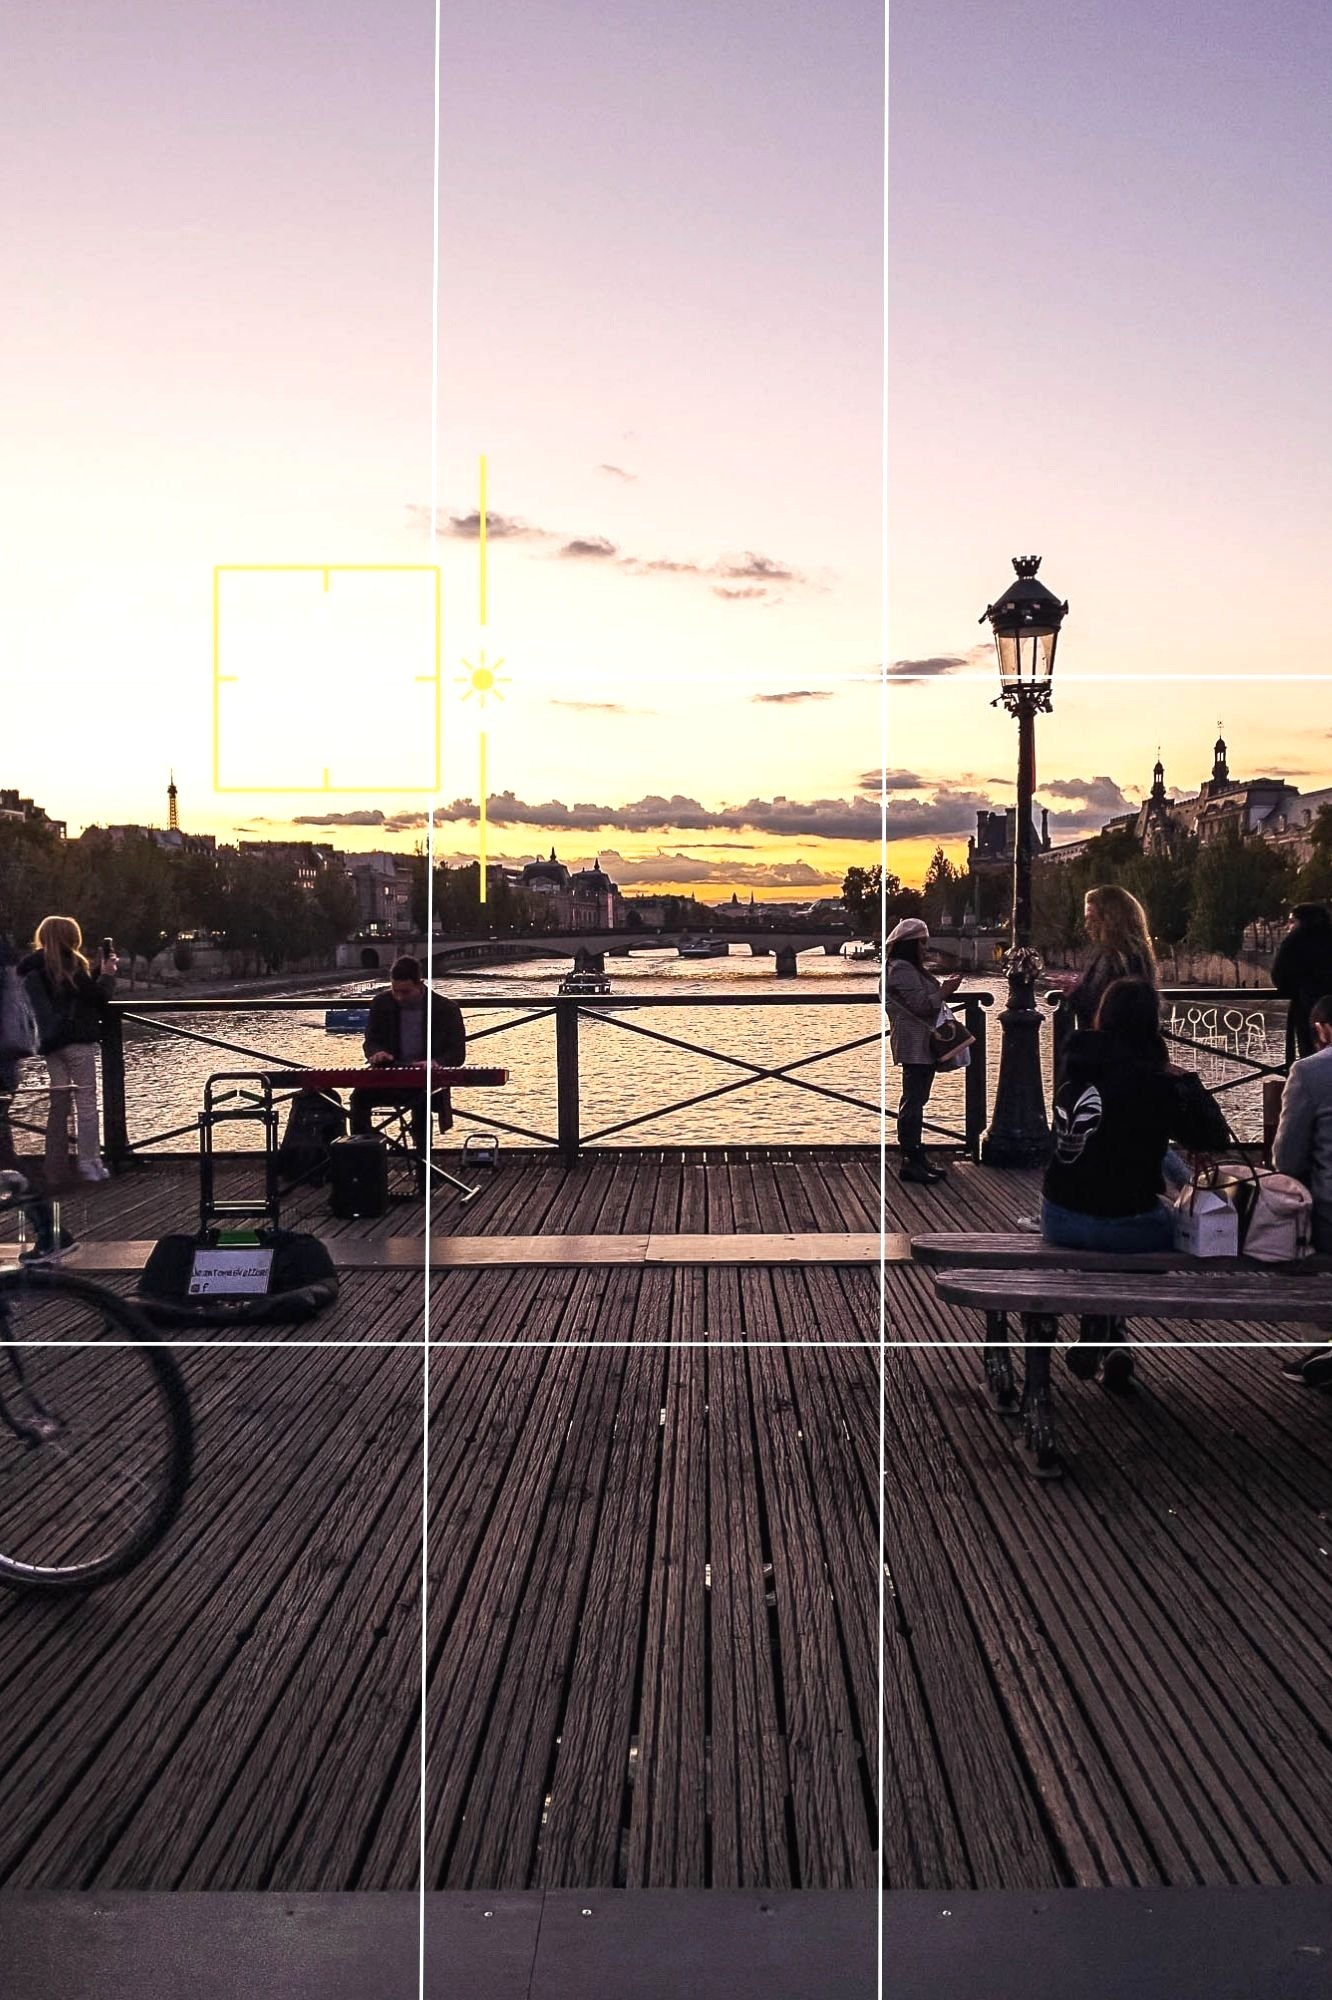
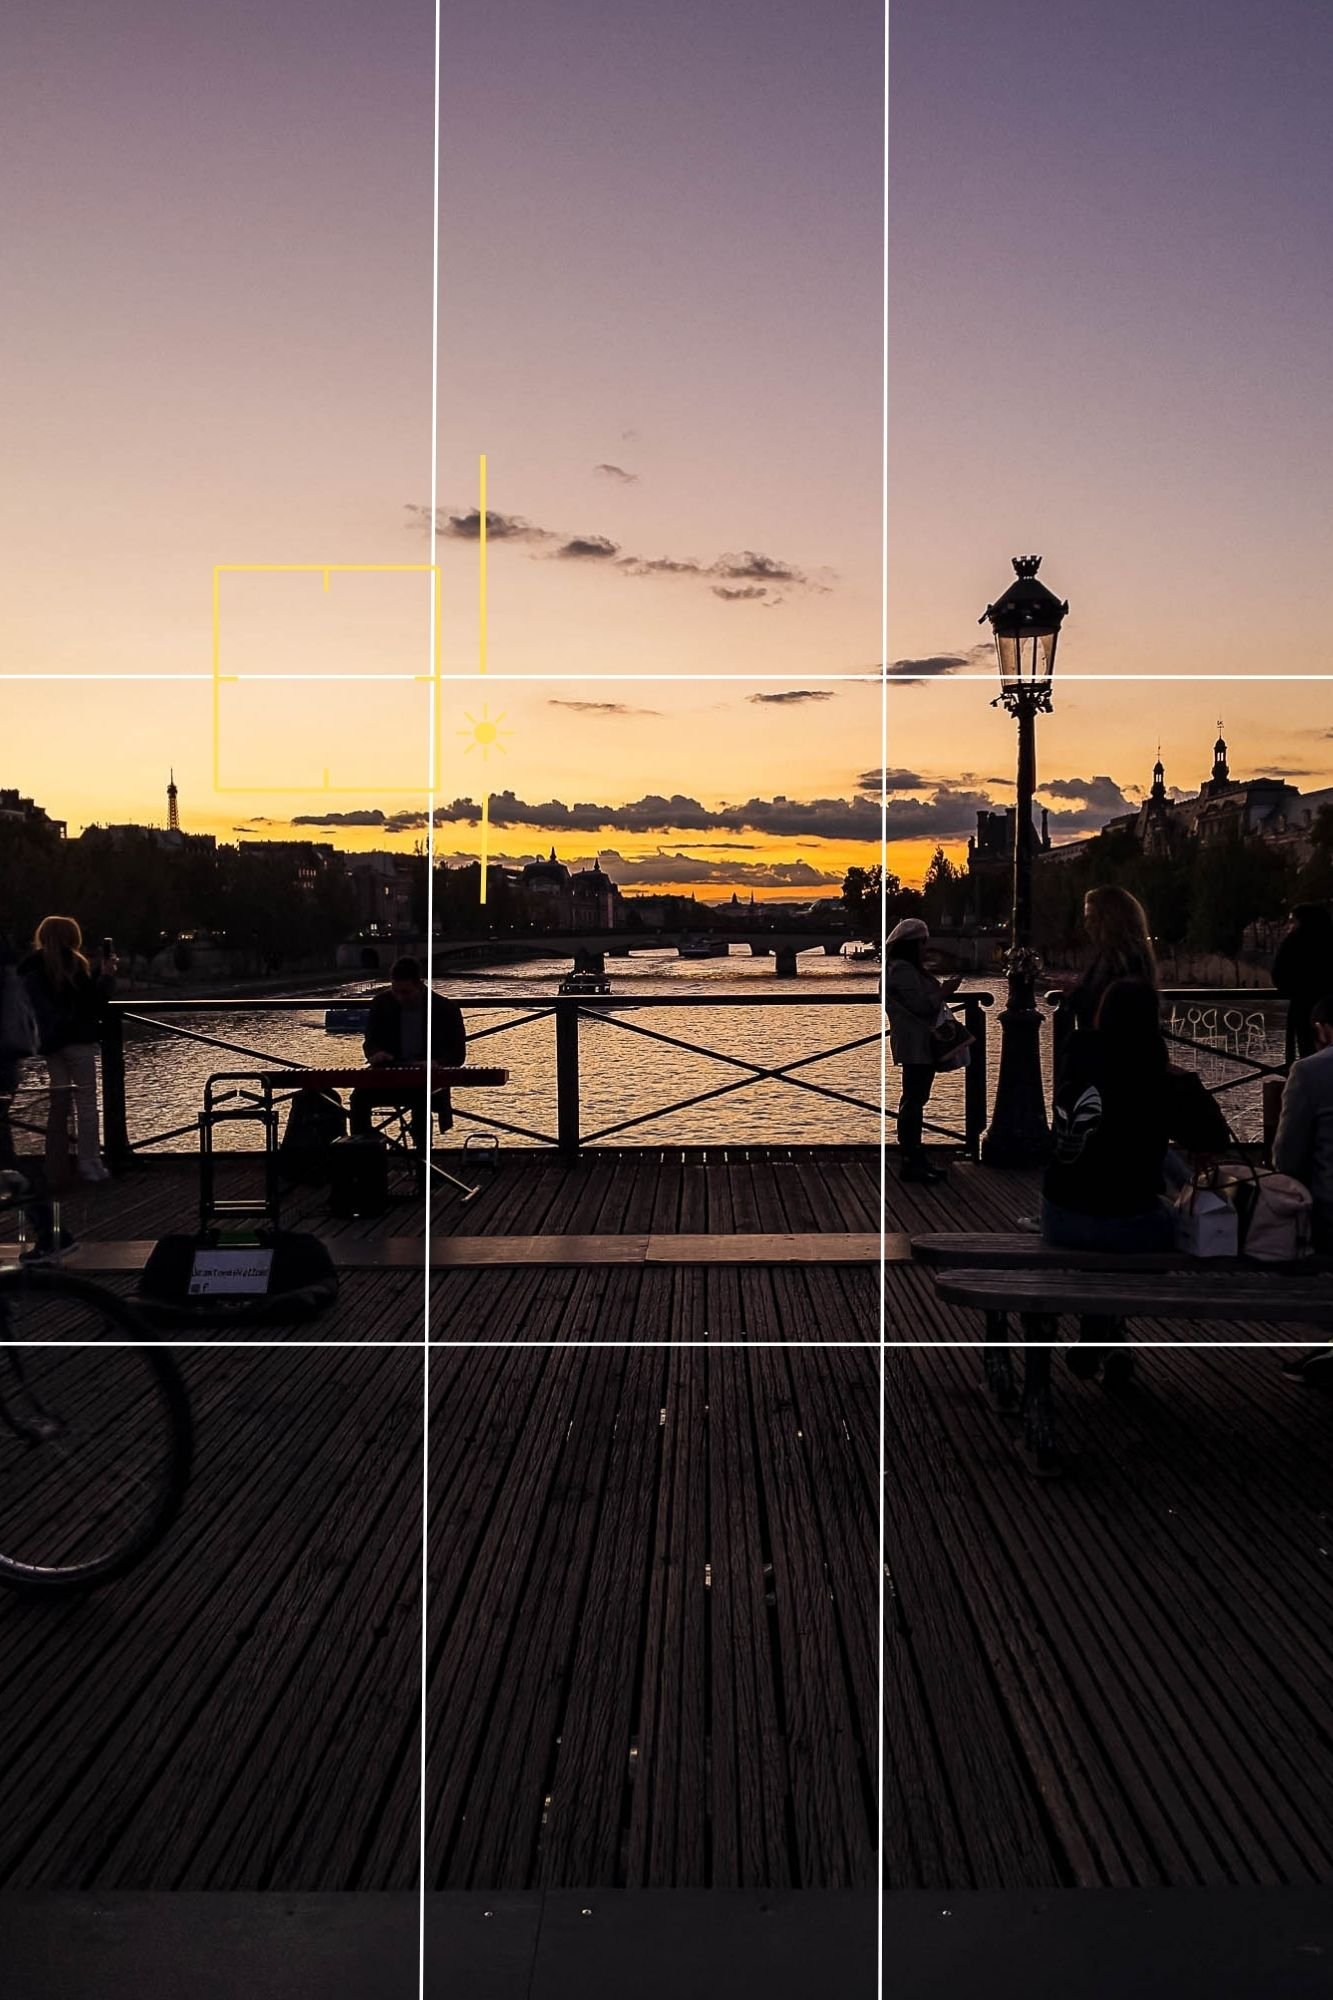
To capture the silhouettes below, each of us began by tapping our iPhone’s screens (the viewfinder) on the brightest part of the image. Then, we adjusted the sun slider (exposure tool) until the sky in each of our images appeared dynamic and full of color in the view finder. The light in the resulting images look true to life, and lets the rest fall into the shadows.
For a more traditionally exposed image such as a portrait, you’ll want to set the exposure so that your subject looks true-to-life and let the rest wash into the background. You can do this by tapping once on your subject in the screen view, which will bring your subject into subtle focus and adjust the exposure of your subject against the surroundings in frame.
We love that this simple exposure tool gives you complete creative license to capture the moment exactly as you see it, right from your iPhone.
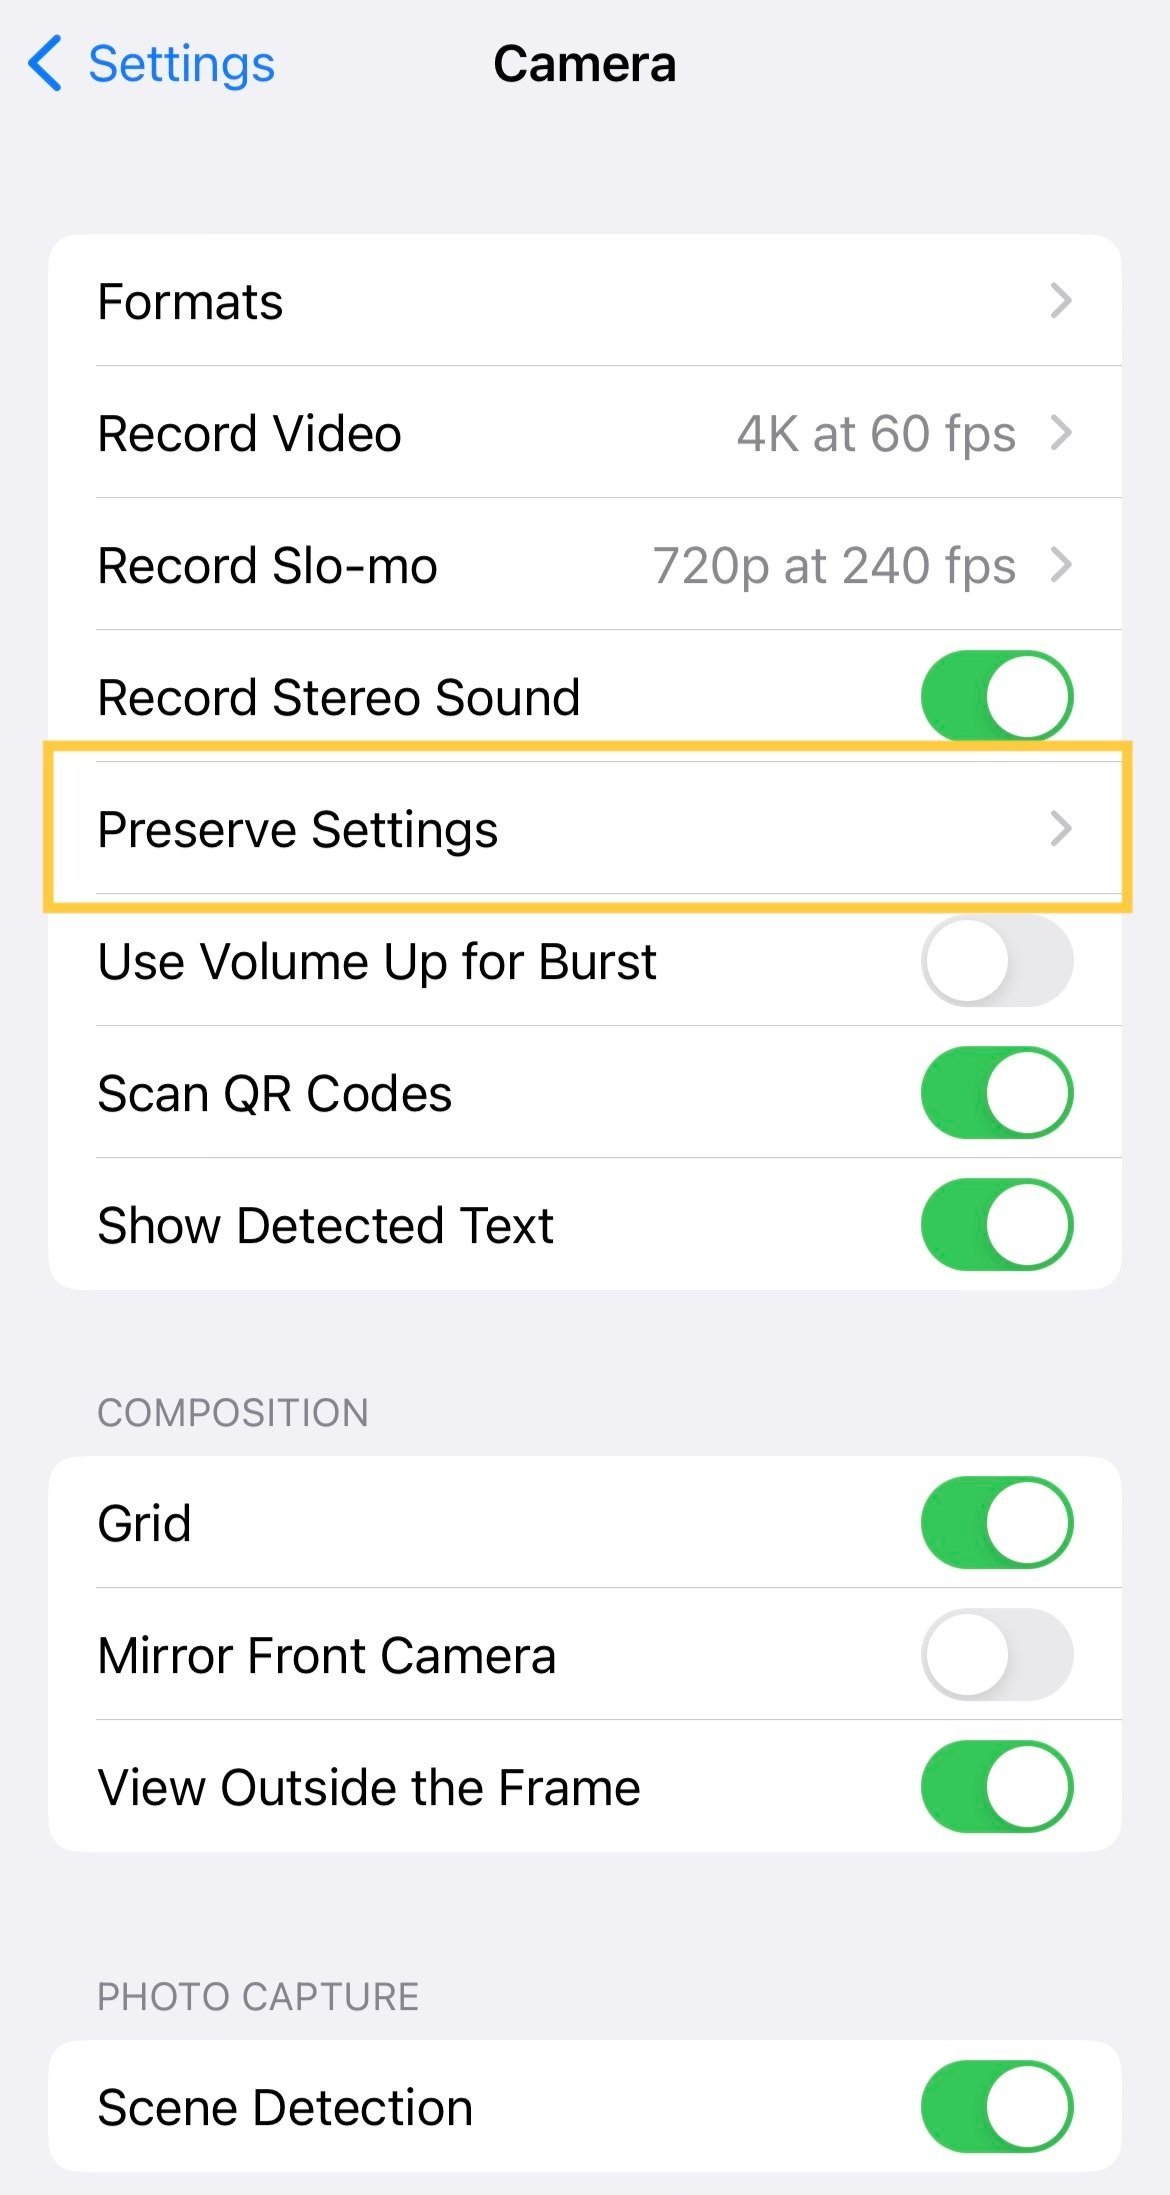
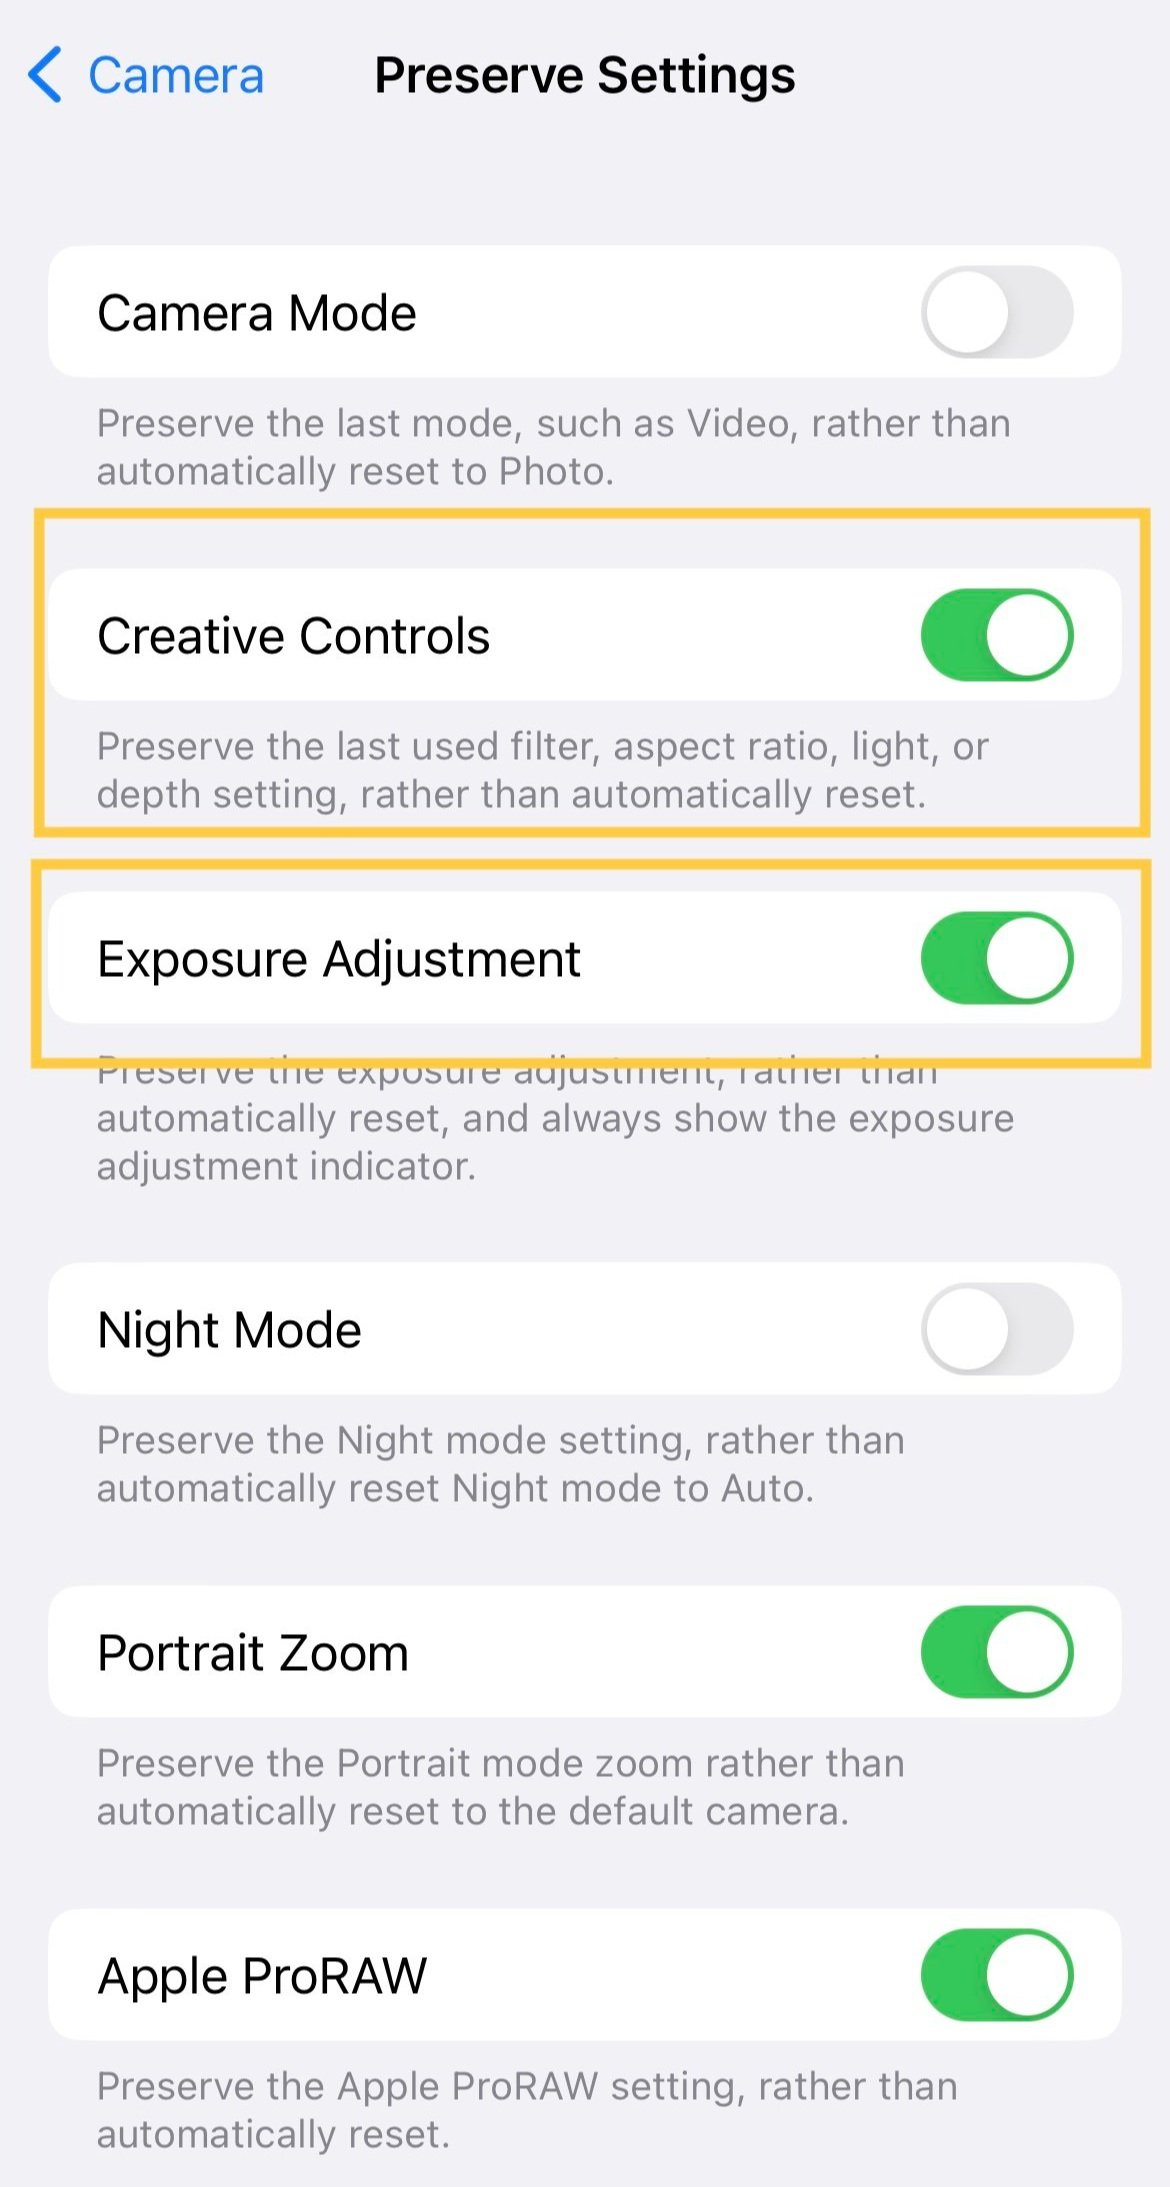
One more note on iPhone Exposure controls: You may adjust your Settings for more creative control of your images, including the Exposure tool.
On your iPhone, navigate to Settings > Camera.
In the top section, click Preserve Settings >.
Toggle Creative Controls and Exposure Management to the “ON” position (green).
With Exposure Management ON, you’ll be able to use the sun or the slider at the bottom of the screen to control for exposure.
Travel Photography Tip No. 3 | Use Portrait Mode… like a Pro
About Depth of Field and Portrait Mode
Heads up: You’re going to see more photography terms in this final tip than the first two tips above, but hang with us! Your iPhone makes this third concept super easy to practice, and it’s truly what can take a photo from “good” to eye-catching.
Did you know your iPhone allows you to control for depth of field in a photo?
Depth of field simply refers to what’s sharp in a photo and what isn’t.
A deep depth of field = the entire photo is sharp.
A shallow depth of field = the background is blurred.
The default Portrait Mode on your iPhone camera recreates a traditional depth of field that’s often used in portraiture: it brings the subject in the foreground of your image into sharp focus, and drops the the details in the background of your image, creating a soft unfocused backdrop. That’s why they call it Portrait Mode :)
However, you can adjust this default setting in Portrait Mode to adjust the depth of field exactly as you’d like it in a given photo. In other words, you can make the background more or less blurry.
This means you don’t need to take a “portrait” to use Portrait Mode for great photos!
To make the background more or less blurry in Portrait Mode, you will adjust the “f-stop,” which measures the size of your camera’s lens opening. This is known as the lens aperture.
When you select a small f-stop number (like f/1.4), your photo has a very shallow depth of field and a very blurry background.
When you select a large f-stop number (like f/16), your photo has a deep depth of field and a sharp background.
Look at the three images below to see how adjusting the f-stop changes the look of a photo. Lauren Gibson snapped this photo using Portrait Mode on an iPhone. Notice how the background gets less blurry as the f-stop goes from f/1.4 to f/8, and finally to f/16.


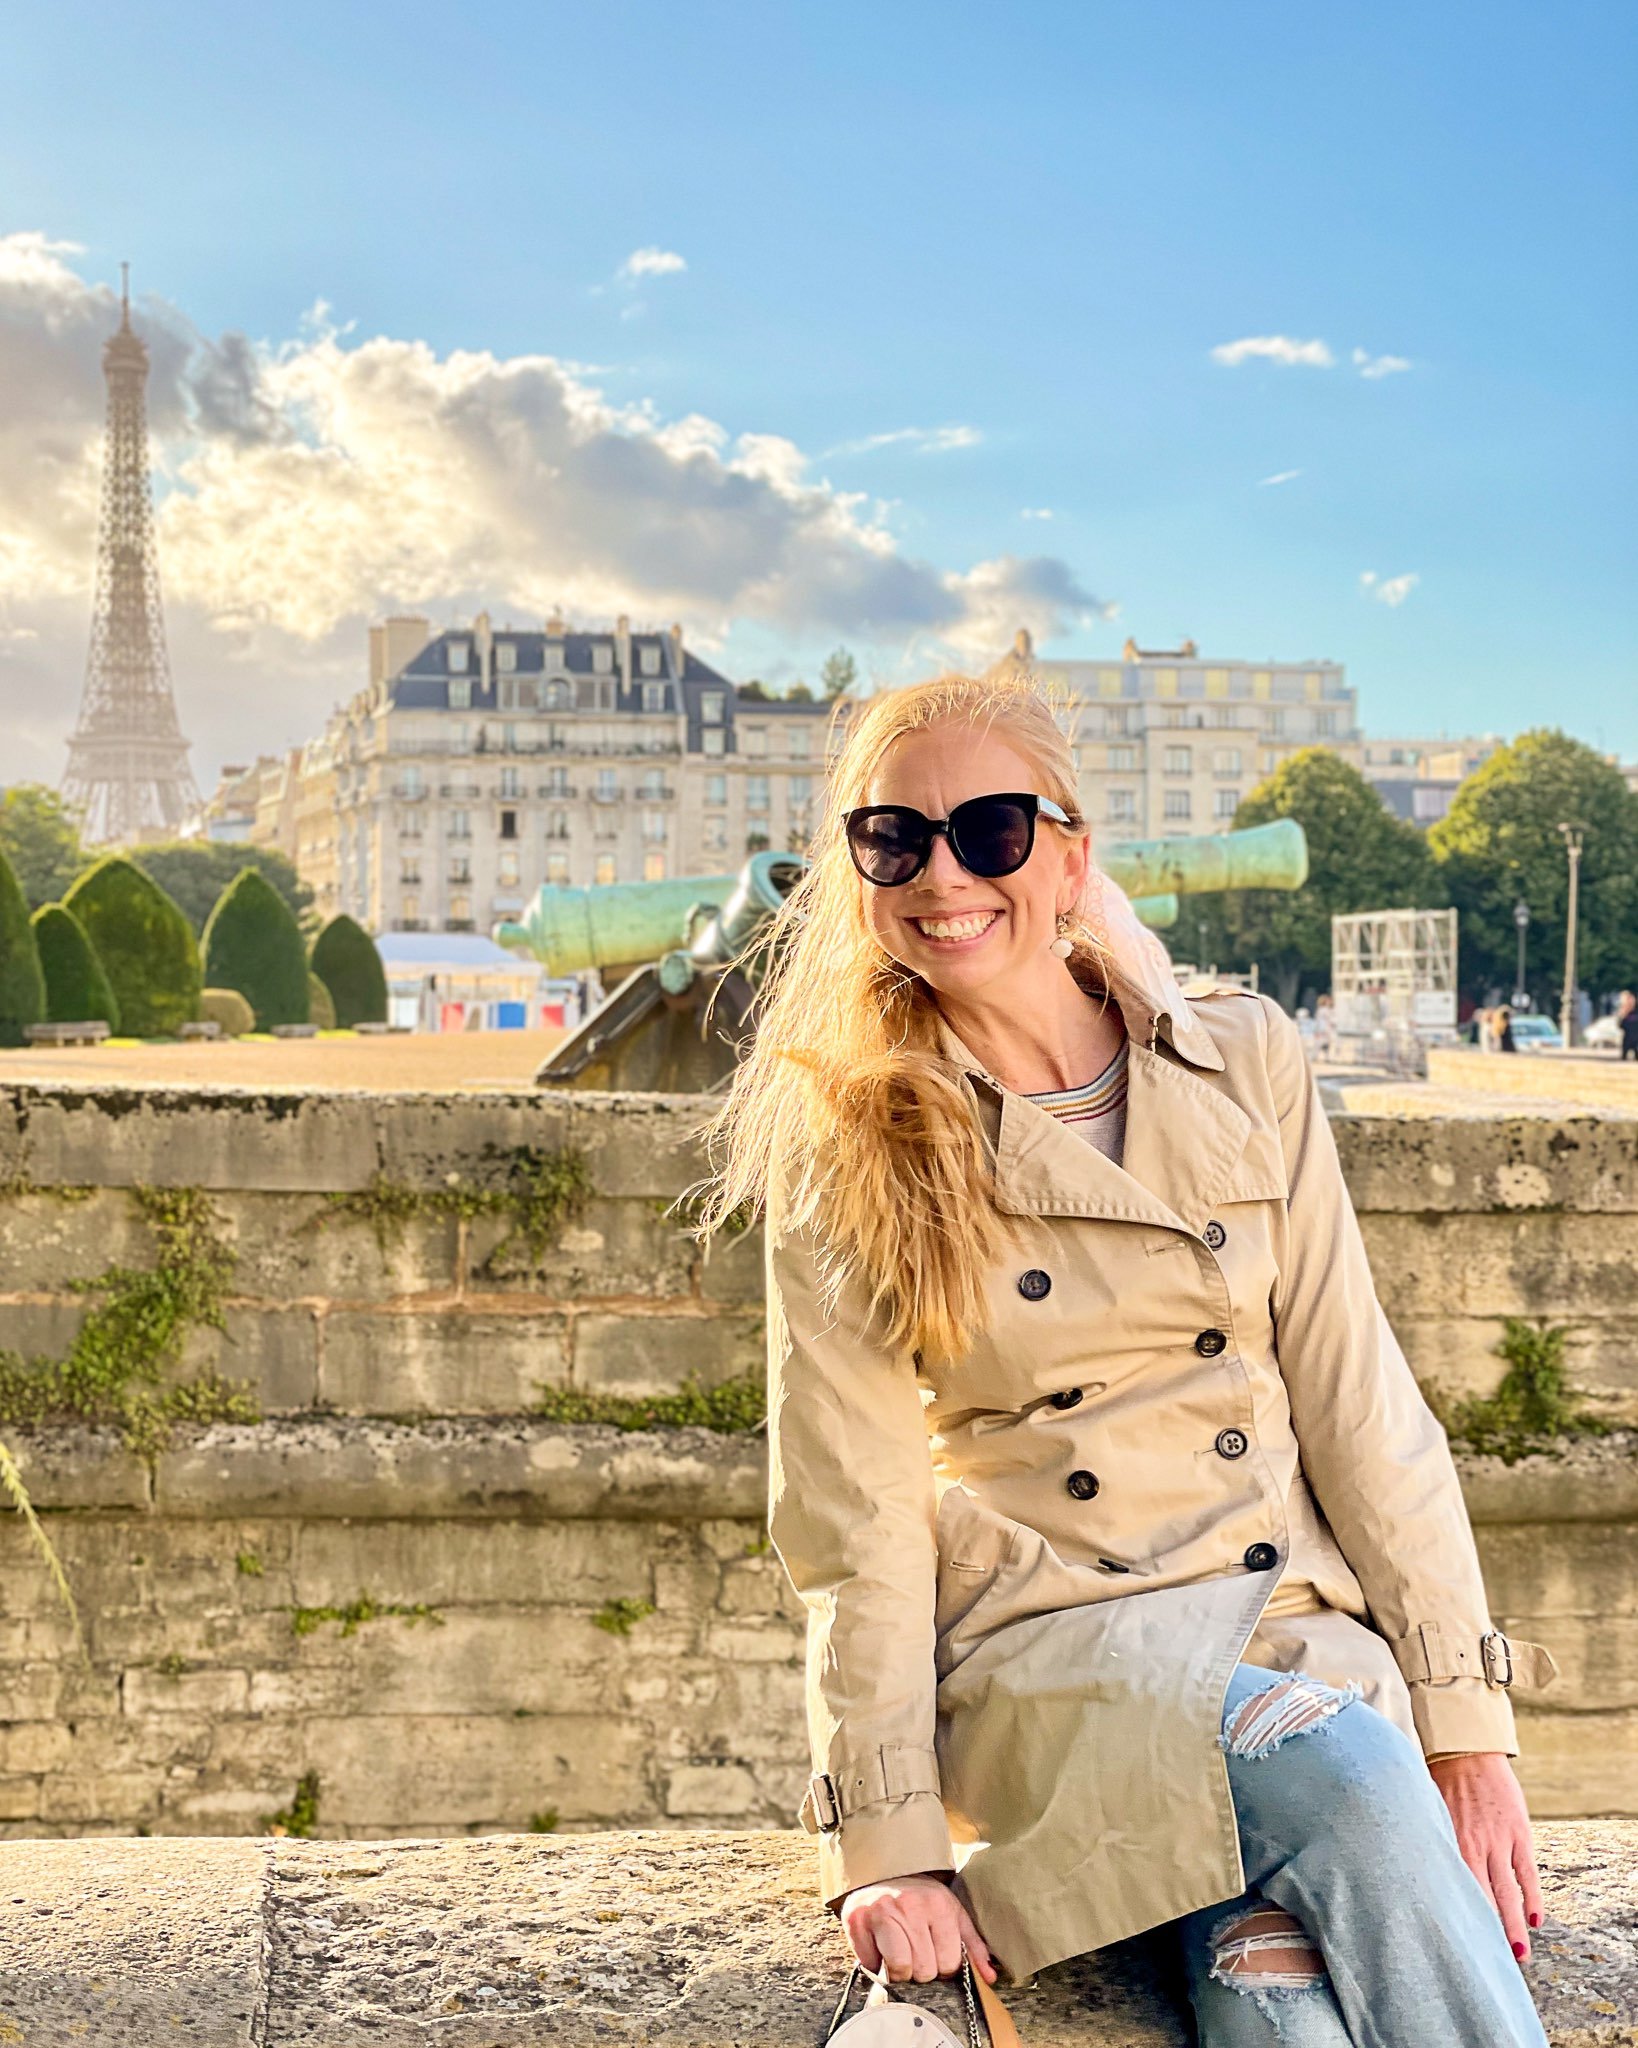
*Special thanks to Tess Hetzel for her stellar modeling in front of Les Invalides, with the Eiffel Tower in the distance :)
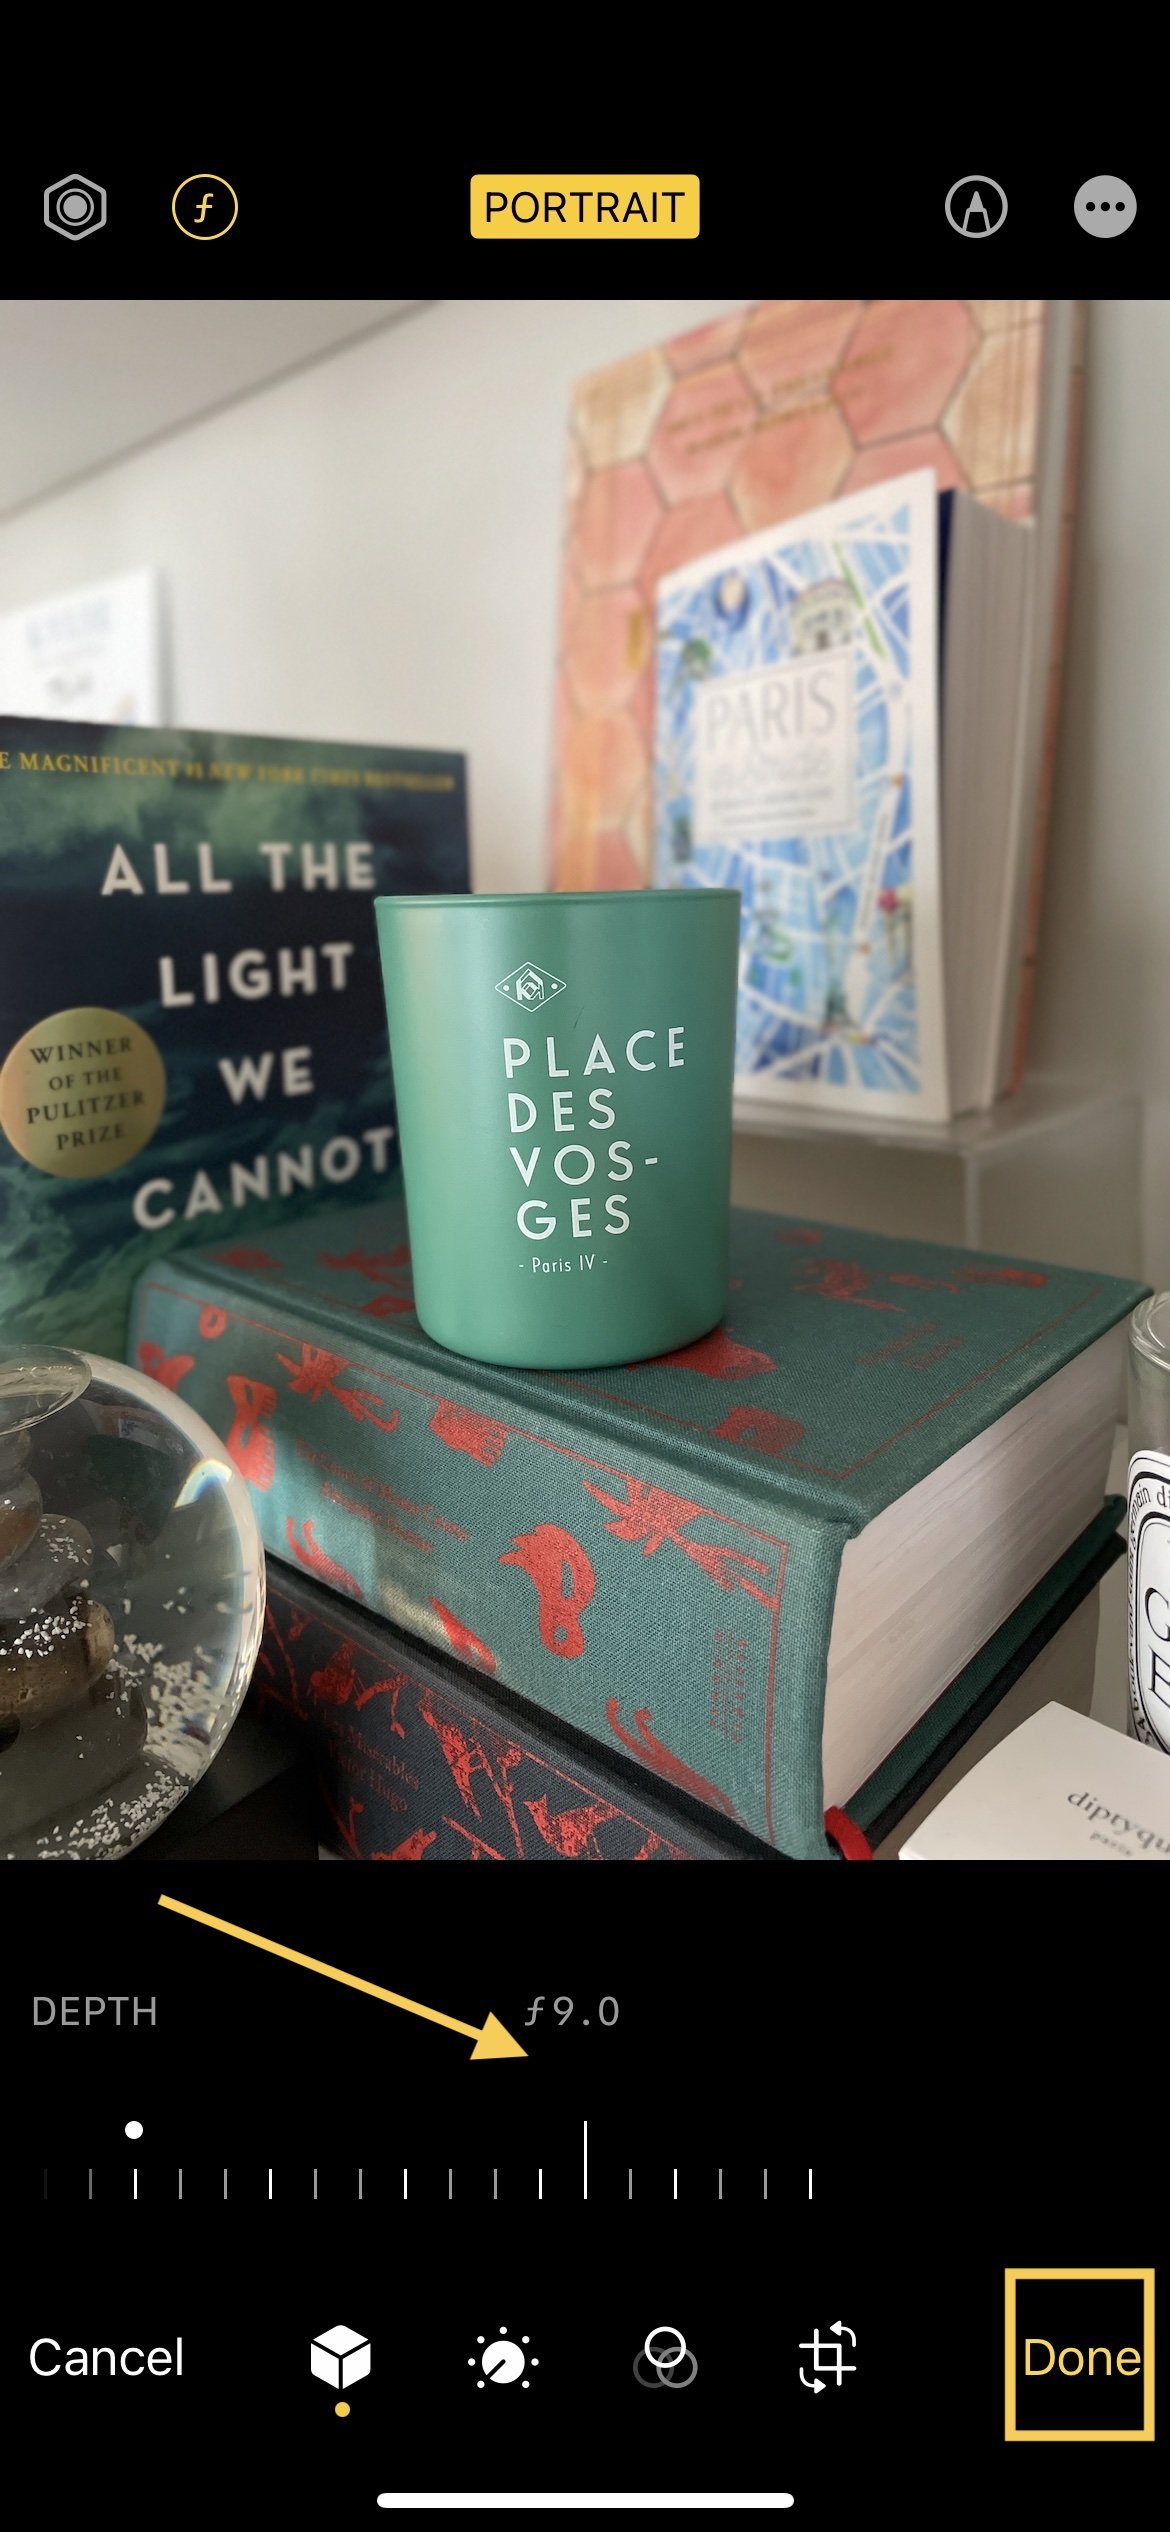
How to Adjust the F-Stop in Portrait Mode
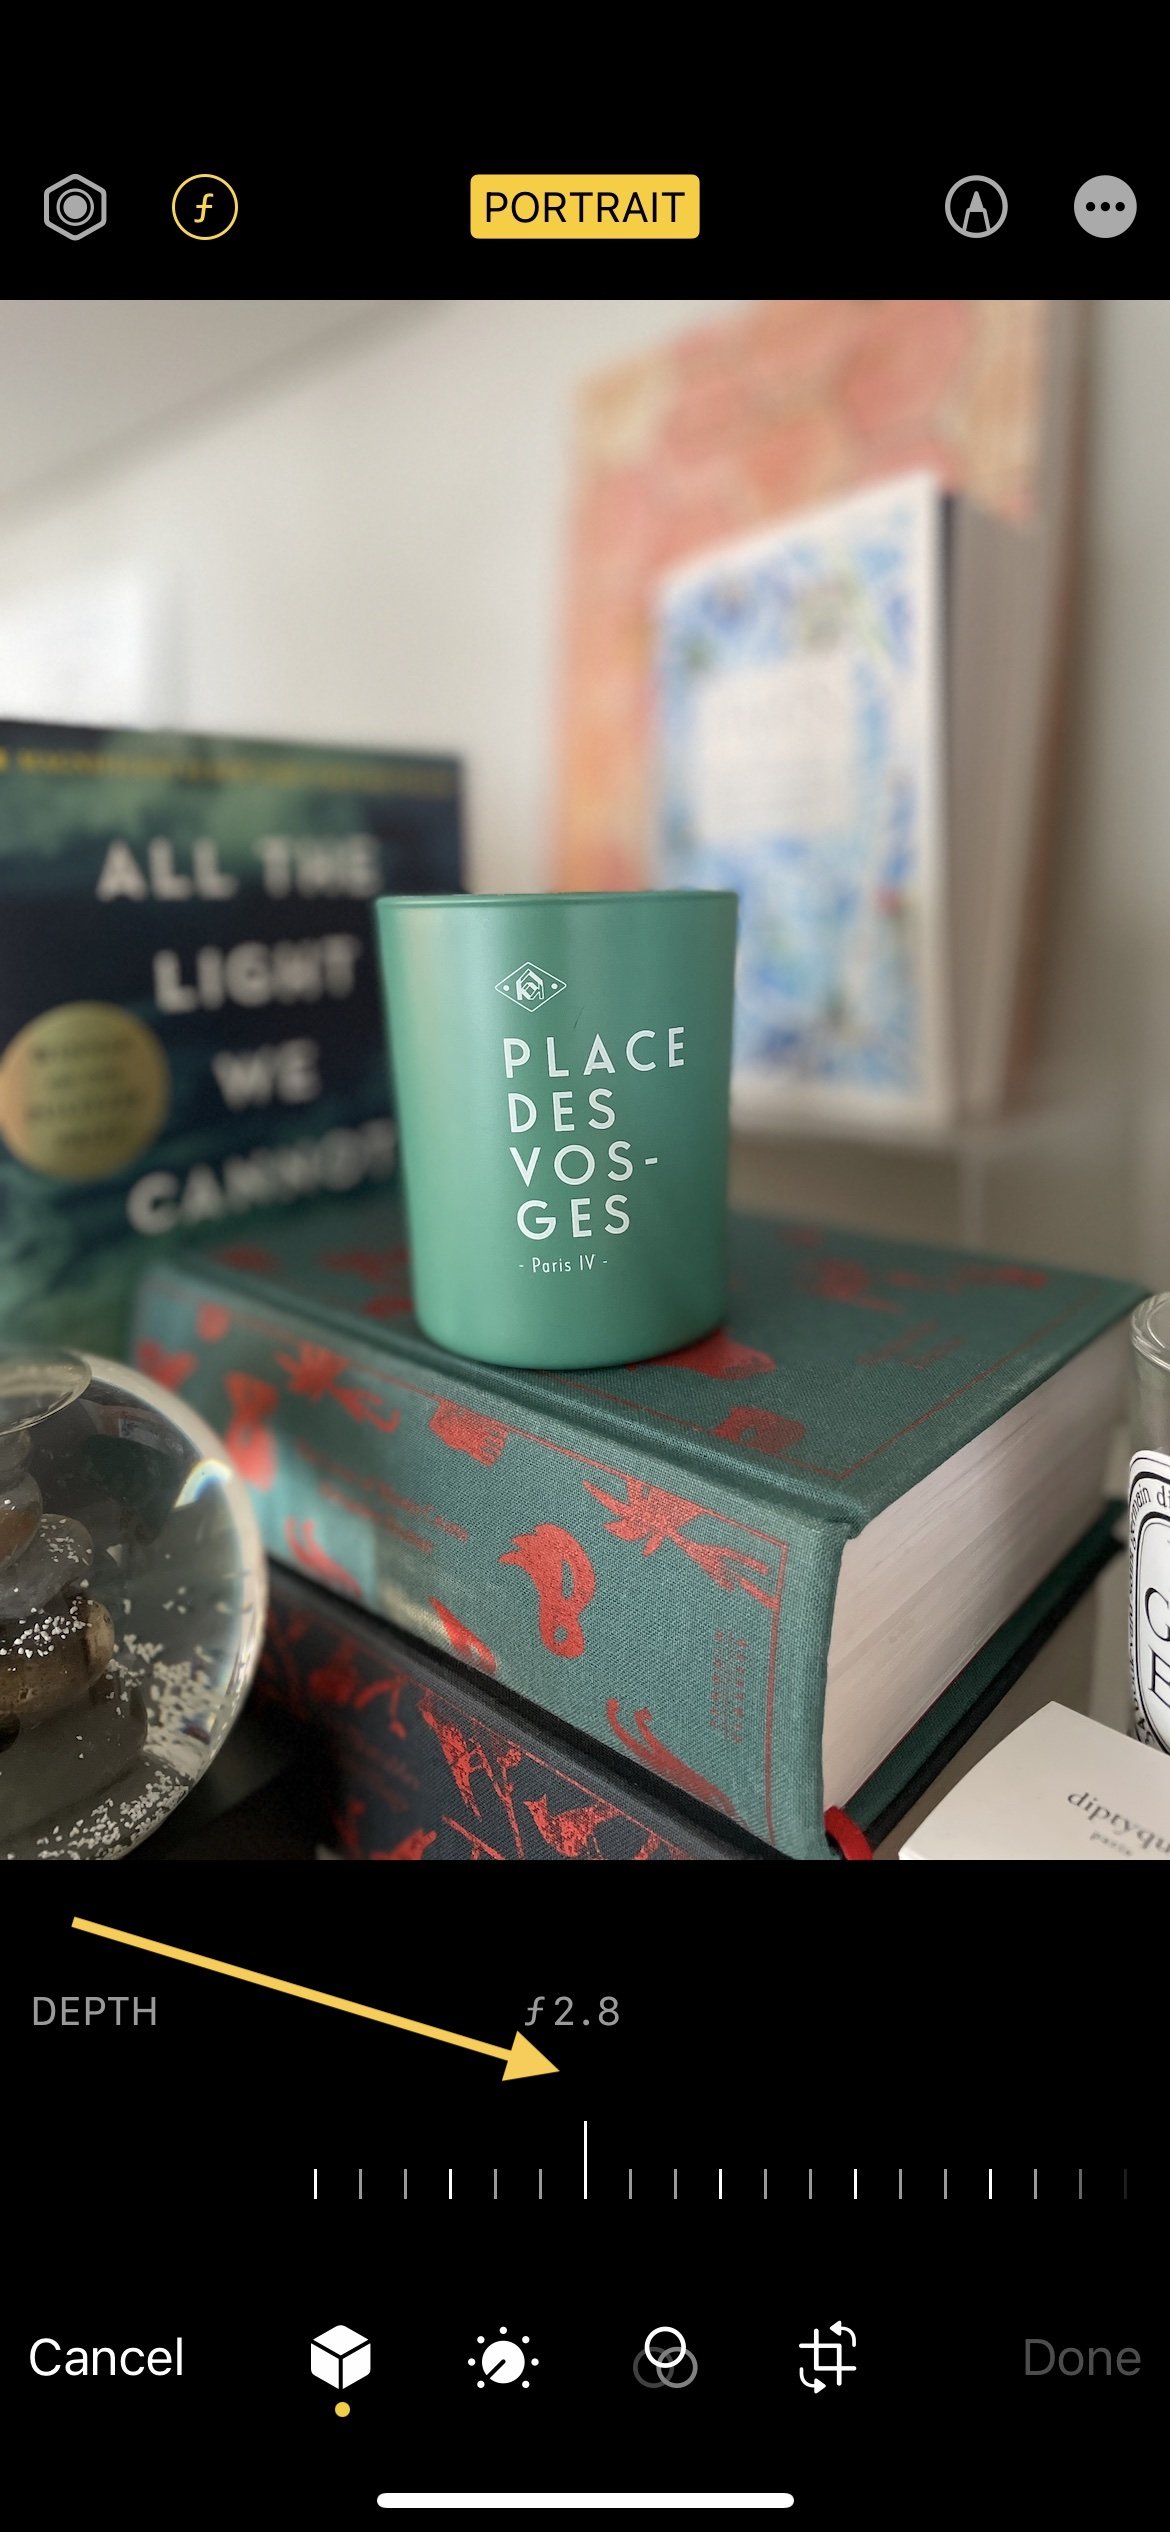
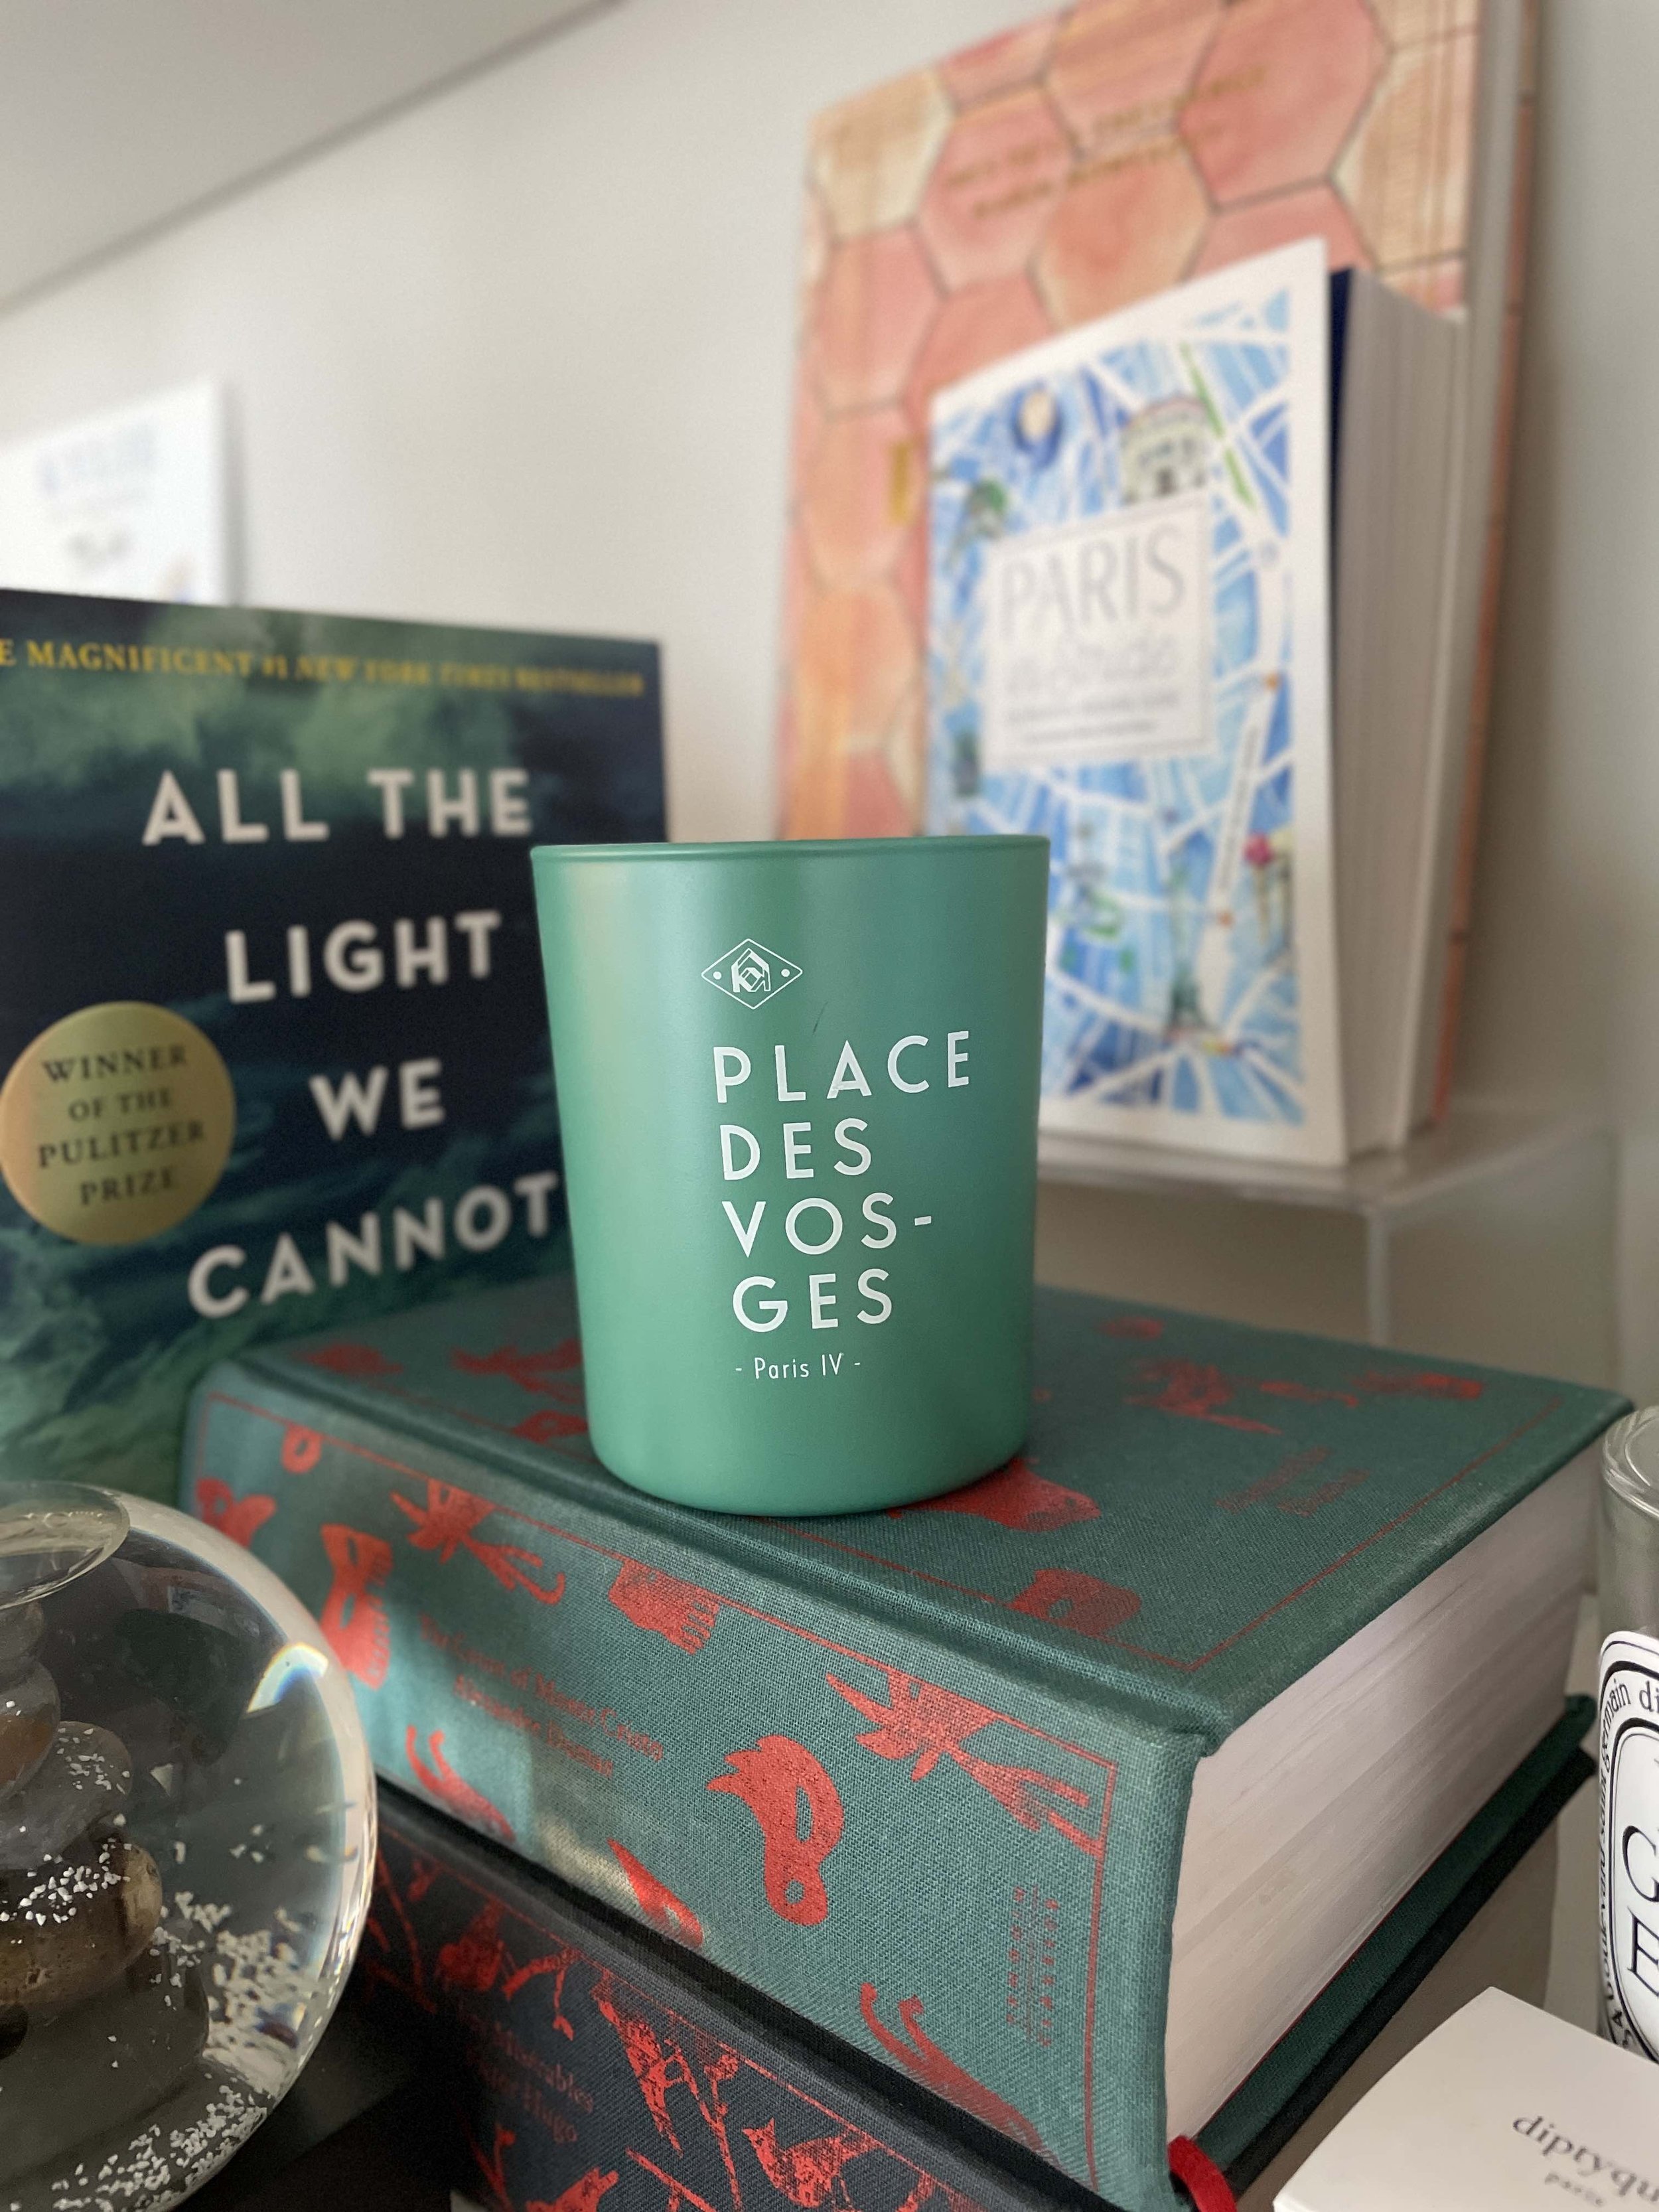
Now, let’s have you play with adjusting the aperture to experiment with the depth of field. To do this on your iPhone you’ll need to shoot in Portrait Mode. Follow the instructions below to try this on your own - you can do this with anything, like this candle in Lauren Gibson’s living room :)

1 - Select Portrait Mode
Open your Camera app on the iPhone
At the bottom of your screen just above the big white capture button is a selector - it likely says Photo.
Swipe through the options to select Portrait.
Use tips 1 and 2 to practice with your grid lines (rule of thirds) and adjusting the exposure). Then take your photo.

2 - Once you capture an image, open it in your Camera app. Click Edit.

3 - Select the f-stop
Look for the f-stop in the upper corner of the screen (it’s a yellow or white logo that says f/2.8).
Depending on the model of iPhone you have, it may be in the top left or top right corner of your edit screen.
4 - Adjust the aperture.
You’ll see a slider on the bottom of the screen - swipe from left to right to change the aperture.
As you swipe from side to side the background in your photo will change from blurry to crisp. This is a perfect moment to discover your artistic voice as you choose how your viewers will experience your work.
Click Done once you’ve found the aperture that suits you.
If you’re shooting in portrait mode on your iPhone, you can adjust the aperture before you take your photo, or after you take your photo. This is pretty incredible!
Fun fact about the two of us as photographers: our photography styles lean on opposite sides of the aperture extremes, proving that the use of aperture is indeed an art and not a science. Lauren Gibson’s landscapes lean on a higher aperture to bring the detail of street photography into full focus. Lauren Olinger’s work makes use of a lower aperture for a soft, ethereal feel.
Note: we have a lot more to say on aperture! If you’re interested in learning more, scroll down to the bottom of this post for a bit more on aperture and its importance in creating a stunning photograph.
Get out there! Practice Photography with Your iPhone
You now have three tools to use when you are capturing images on your iPhone. These three tips are based in core photography principles - we love that with a few tool tips, you can capture photos that best reflect your memories and your creativity. With each of the three tips we’ve provided, there is truly artistic and creative license to use these tools to align with what you love capturing in an image.
The best way to apply these photography principles is to practice. It doesn’t matter whether you are at home or traveling to a dreamy destination. The more you play with composition (grid lines), exposure, and aperture on your iPhone, the more comfortable you will get with these tools. Your images will speak more to your own creative style and you’ll be shooting incredible, dynamic images… all with your phone.
We’d love to hear from you - comment below about these tips - are any new to you? Any tips you plan to try out (wherever you are)? We can’t wait to hear from you!
~ Lauren Olinger & Lauren Gibson
More on Tip No. 3: An Overview of Aperture
For those interested in learning a bit more about aperture and its importance in the world of photography.
Understanding aperture is truly the je ne sais quoi of a great photo. Not only does it impact the amount of light that hits the sensor, it is responsible for how much of the photo is in focus and how much may slip into a lovely creamy backdrop. The most traditional use of aperture is to bring everything into sharp focus for a landscape and let the background sink away in a portrait. This is a tried and true technique to engage your viewer’s eye with what you are seeing as the artist.
The aperture refers to the size of the opening of your camera’s lens. Open your eyes very wide for a moment - you can see clearly but the harder you work to open your eyes, see how it’s a bit more difficult to focus on more than one thing? Now excessively squint your eyes - you can actually see things around you slightly more clearly, but it looks darker.
This imperfect example hints at what aperture refers to in photography: if the lens is really wide open, you’ll get lots of light, but the focus will be on things that are closer to you (this creates a shallower depth of field, like a traditional portrait). As you make the lens opening narrower, you create a deeper depth of field and the background is sharper (like a traditional landscape photo).
Look at the three images below from Lauren Olinger to see aperture at work:

Image 1: f/2.8: crisp subject, slightly out of focus background
This leaves the subject decently crisp and gives a nice fall off in focus so that the background doesn’t interfere with our experience of viewing the girl on the playground.

Image 1: f/2.8: crisp subject, slightly out of focus background
As we slide the aperture all the way to f/1.4 (photographers call this a “wide open aperture”) we see the background get so soft it no longer looks true-to-life. This can be an interesting style choice as long as it’s used with intention.

Image 3: f/16: selected for a deeper depth of field
In the third photo we’ve brought the aperture all the way up to f/16 so that every last branch is in sharp focus. This is a common choice for landscape photography and straight forward documentation but ultimately isn’t quite how we experience vision either. Unless you’re making an artistic choice, your best bet lies somewhere between these extremes. -Lauren Olinger